
New to Pinegrow? This interactive guide is the best place to start. We’ll go through all Pinegrow panels and take them for a spin.
DocsGetting startedDocsGetting started2021-10-02
Interactive introduction to Pinegrow
We’ll need a page to play with during this introduction. To open the sample page used in this guide, open the in-app help in Pinegrow by clicking on the in the top toolbar. There, go to “Getting started with Pinegrow” and click on the “Open the sample page” button. Or, you can open one of your own pages and experiment with that.
Note Feel free to mess up the sample page as much as you want during this tutorial. You can always close it and open a fresh copy by clicking on this button again.
The page view
Most editing operations in Pinegrow happen on the page view.
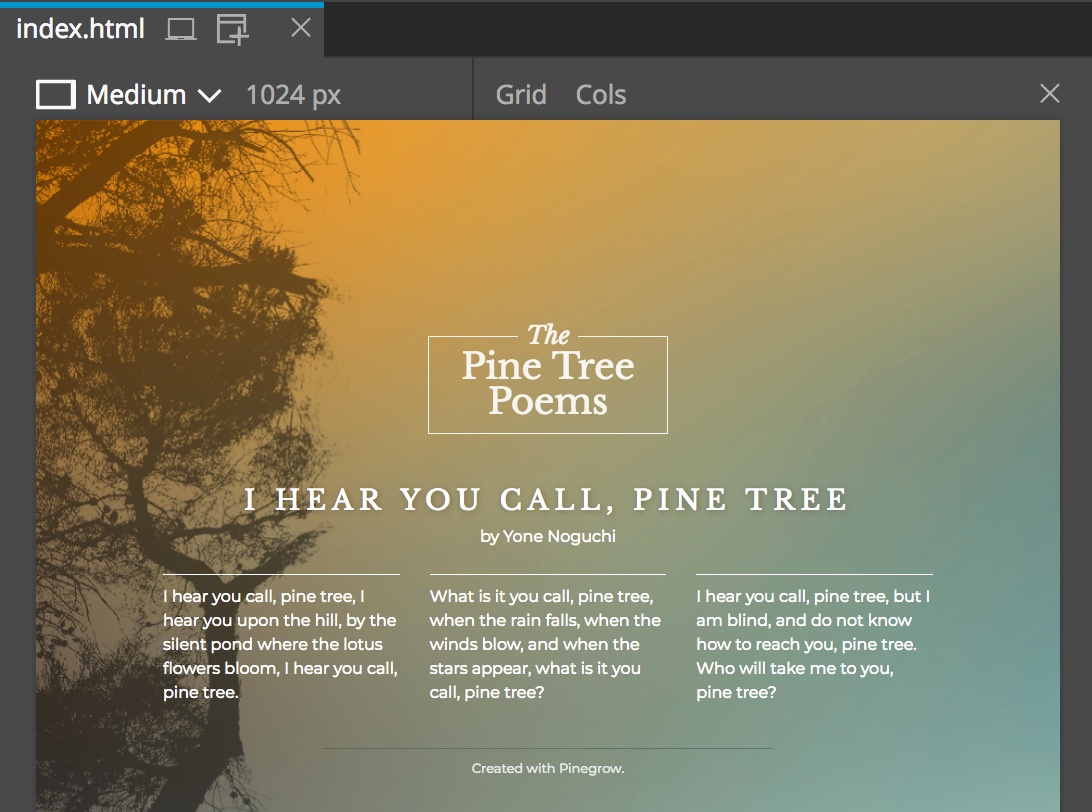
Play around with page views:
-
Move the mouse over the page view. Notice that hovered elements get highlighted with the green border.
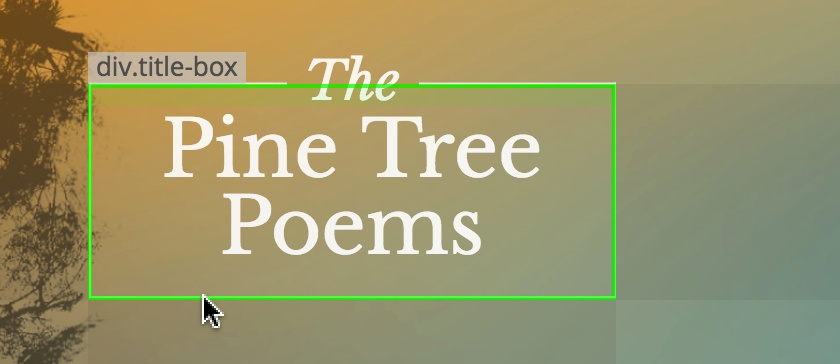
Highlighted element. -
Click once on an element on the page to select it. The selected element has a blue menu and border.
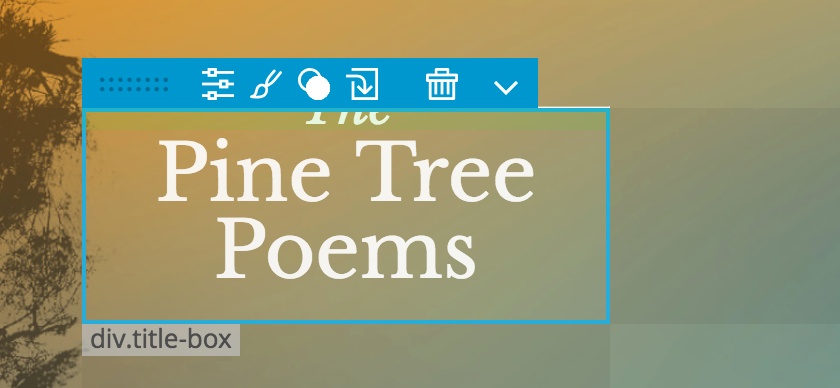
Selected element. -
Try clicking on the Duplicate
icon or press
CMD +
D to make a copy of the selected element. -
Click on the Delete
icon or press
DELETE to get rid of the duplicated element. Use undo if things get messed up.
While you’re working with your page, the Tree panel lets you keep an eye on the page structure.
The Page structure
Open the Tree panel.
The Tree panel displays the nested HTML structure of the selected page. The selected element is blue.
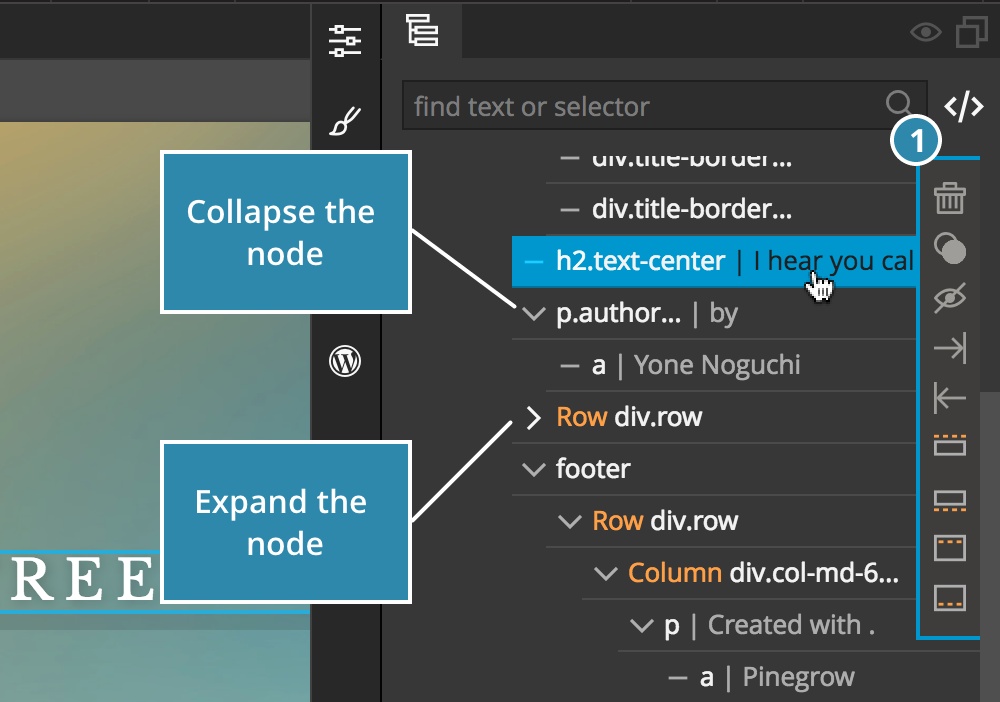
Let’s take a quick look at the tree:
-
Click on any element in the tree to select it. This element will also be selected in the page view. A menu
1 will appear next to the selected element in the tree. -
Elements that have children (other elements inside itself) can be collapsed and expanded. Click on
and
icons and see what happens. Use collapsing to hide details that are not relevant for the task at hand. - The Tree panel also lets you do precise drag & drop moves.
Adding elements to the page
Open the Library panel.
Library panel contains HTML elements and components (groups of HTML elements) that we can add to the page.
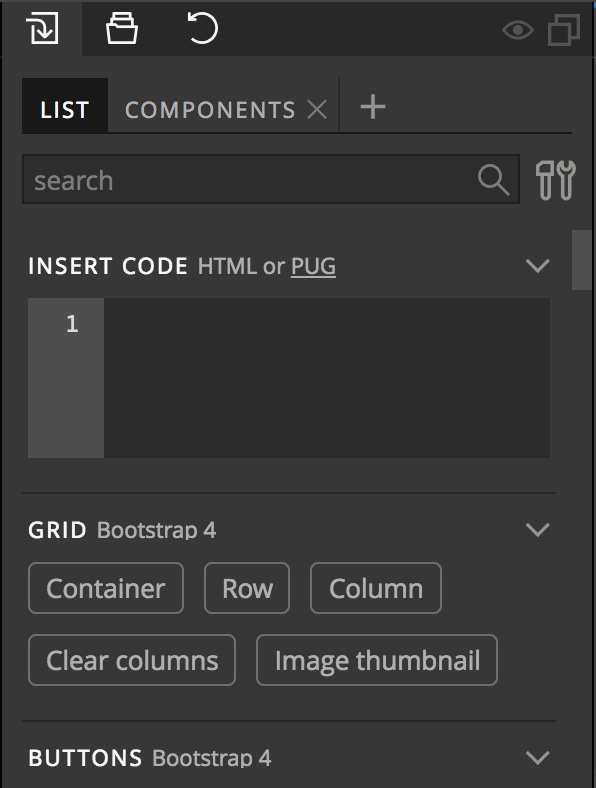
Let’s add a new element to the page:
-
Take a h3 from the Library and drag it to the page. The orange line will show where the element will be placed.
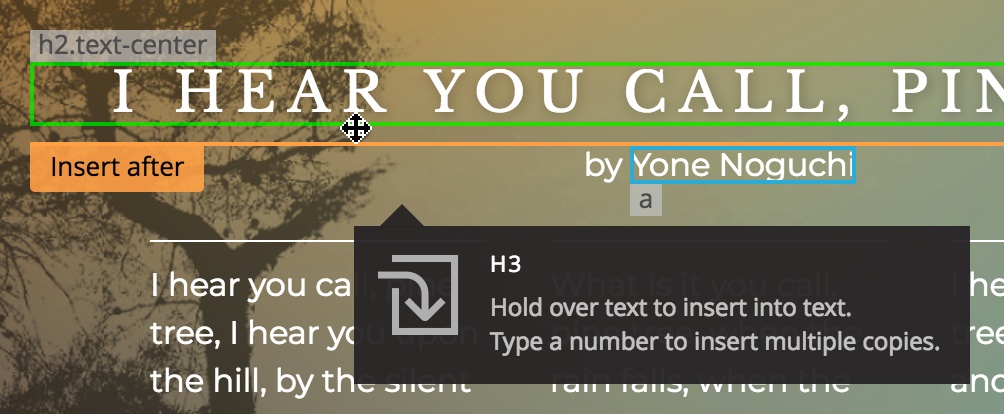
Dragging h3 from Library to the page. -
Take another element from the Library panel and drag it to the Tree panel. As always, use undo if things get messed up.
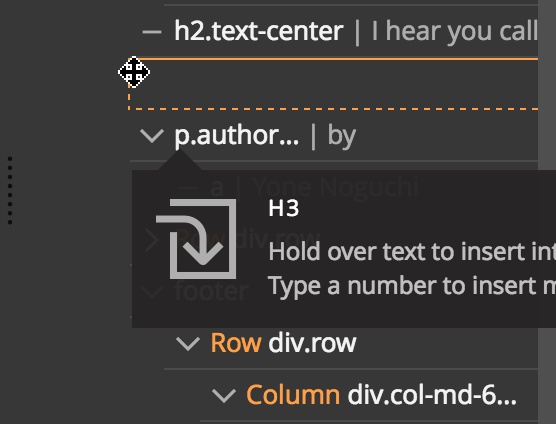
Dragging h3 from Library to the tree. -
Type “p Hello” into the Insert code box (that’s a simplified syntax for <p>Hello</p>. A “p | Hello” item will appear just below the code editor. Drag it to the page.
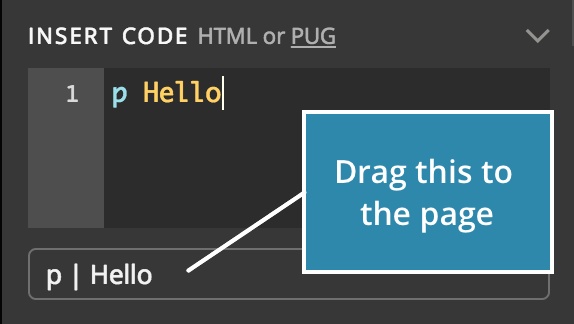
Inserting the code.
Element properties
Open the Element properties panel.
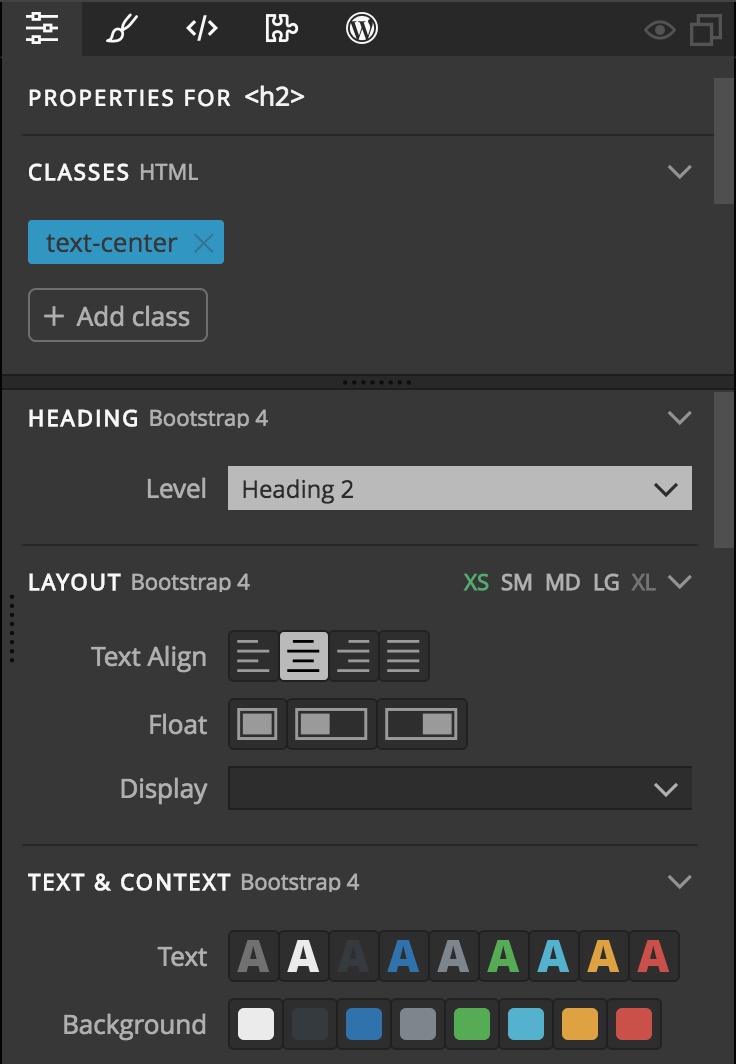
Use Element properties panel to edit element’s attributes. For example, to change source and alt text attributes of an image. Classes are managed there as well. And the panel contains controls for properties defined by frameworks like Bootstrap.
Let’s try to edit some properties:
-
Select the h1 heading on the page or in the tree. Use Heading level control (in Heading section) to change the level to Heading 2.
-
Add a class by clicking on Add class button
1 in Classes section. A floating tool
2 will show up. Enter a class name (for example, title) into the input field and click on Add class button
3. Close the floating tool.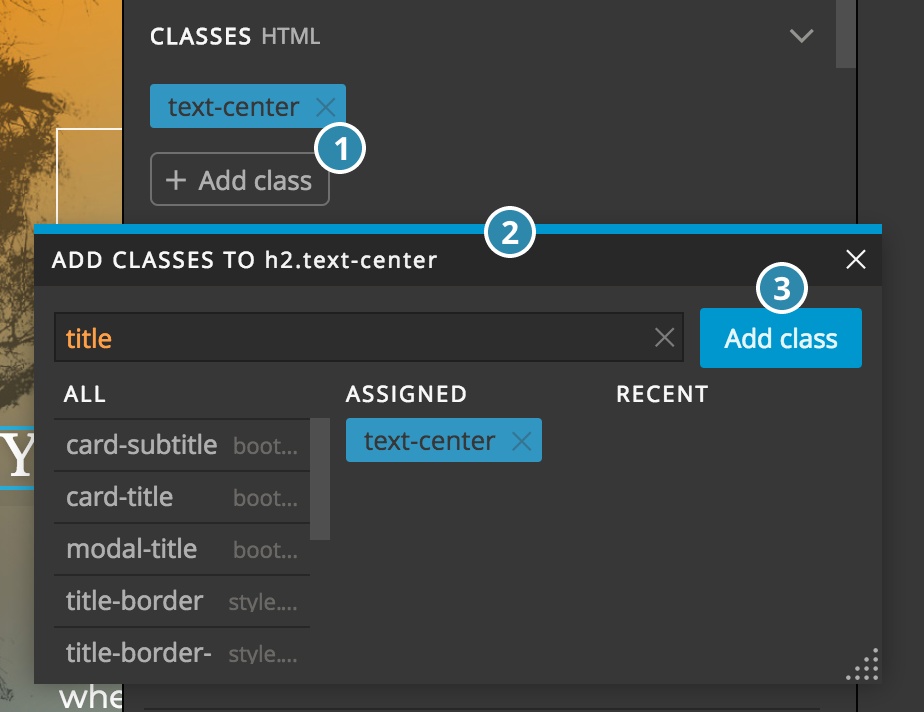
Add class from the Properties panel. -
Play around with Bootstrap controls in Text & Context section.
Style - Paint with CSS
Open the Style panel.
Visual styling of page elements is done with CSS rules. Each rule has a selector that specifies what elements are affected by the rule and properties like color, font, etc. that define the visual style.
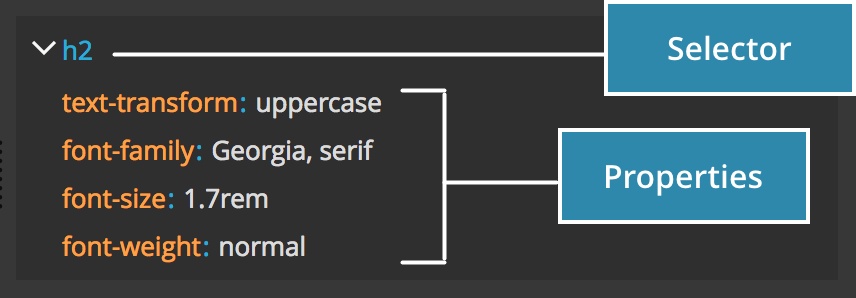
We’ll spend a bit more time on this panel because it is a very powerful tool if you know how to use it effectively.
Exploring and editing existing CSS rules
Select the big Pine tree image on the sample page and take a look at the Active tab in Style panel: Active tab 1 displays all CSS rules that affect the selected element.
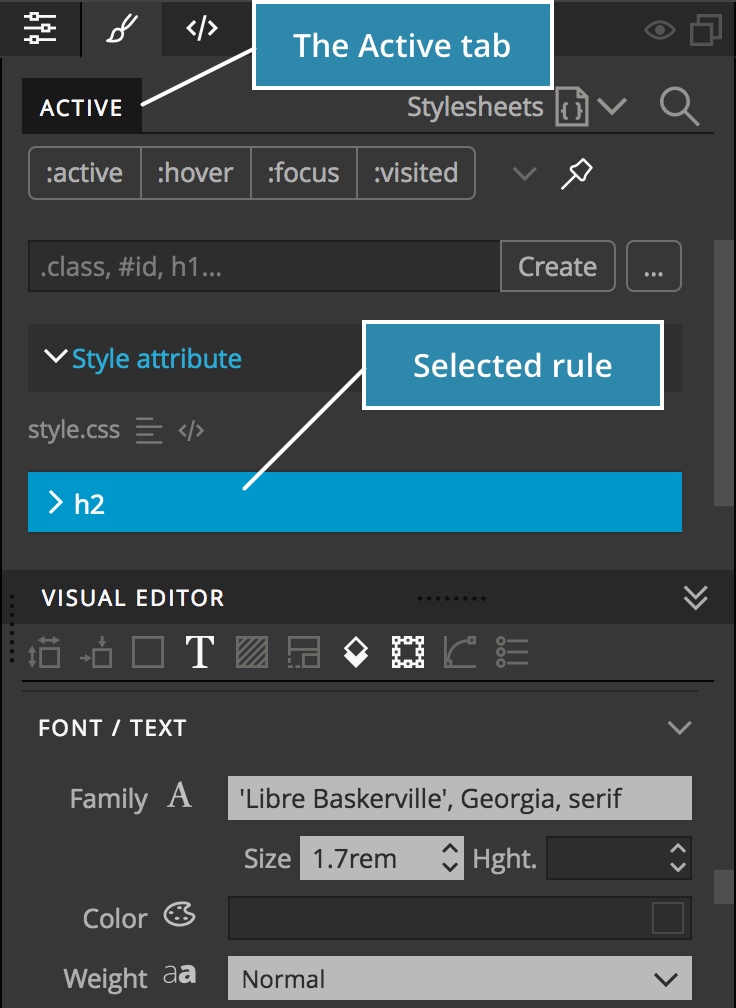
The Active tab also displays the style set directly on the HTML element with the style attribute 2. We’ll explore it a bit later.
Rules from framework stylesheets, like bootstrap.css, are hidden by default. Click on the Show more links 3 to display them.
Visual editor 4 contains visual controls for editing CSS rule properties.
Let’s do some styling!
- In Visual editor play around with the text properties in the Font / Text section
1.
Creating new CSS rules
So far we were modifying an existing CSS rule. Let’s create a new CSS rule now:
Add a new CSS rule:
-
Select the h1 heading element on the page. Enter a class selector into the Create rule input box
1, for example, “.big”.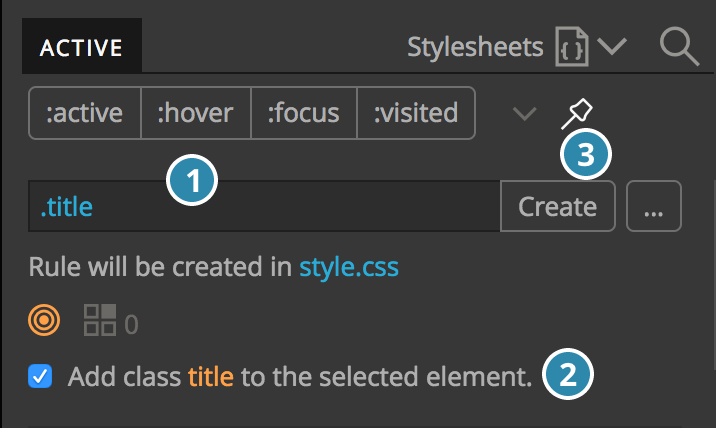
Adding new CSS rule for the selected element. -
Since the selected h1 doesn’t have the .big class assigned, Pinegrow will offer to add the class to the element
2. Leave that check box on. -
Click on Create button
3. Since this is the first CSS rule that we are adding, Pinegrow will ask us to confirm which stylesheet should be selected as default for adding new CSS rules. Let’s choose style.css. After we set the default stylesheet, all new rules created with the Create button will go there.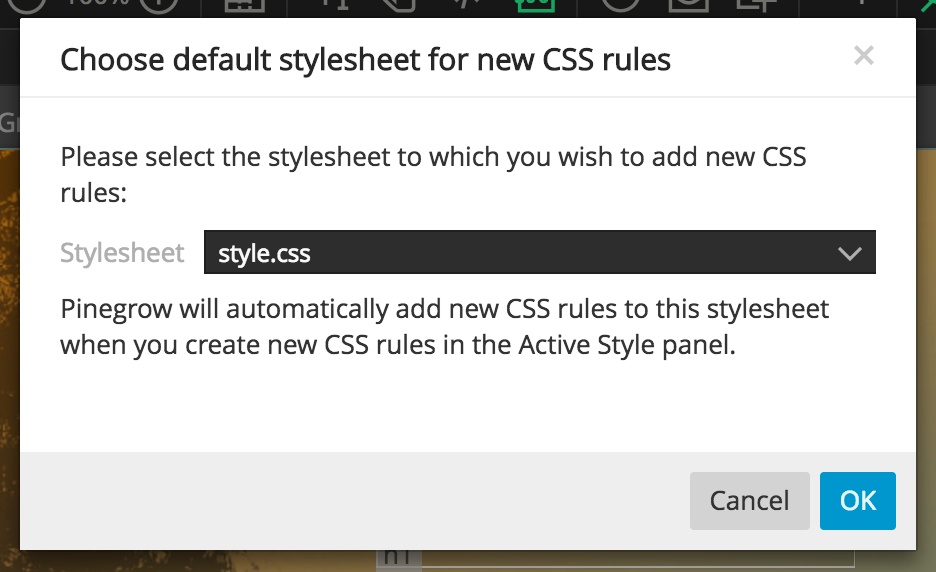
Confirming the default stylesheet for new CSS rules. -
The .big CSS rule is now created
1 and displayed in the Visual editor. Use control selector (or scroll) to go down to the Text section. Play around with different controls.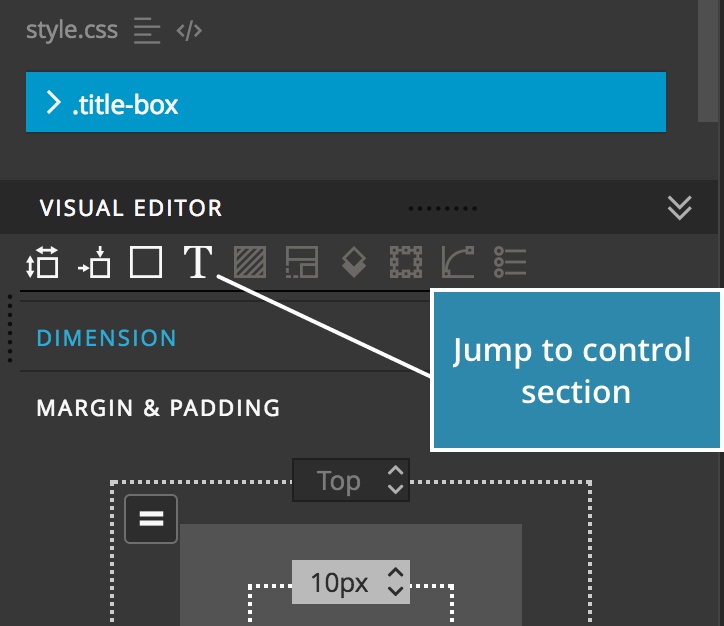
Using text controls in Visual editor.
Quick styling with Style attribute
Every HTML element can have the style attribute for setting its visual properties. For example:
<h1 style="color:red>I'm red!</h1>Although the style attribute is the quick and easy way of styling elements, using it is not recommended. Why? Because instead of using one CSS rule to tell the browser that all H1 elements should be red, you have to specify the color on each and every H1 element on your site. Now imagine that you have 20 pages and want to change the color to green.
But, Pinegrow knows a smart way of using the style attribute:
Let’s paint with style attribute:
-
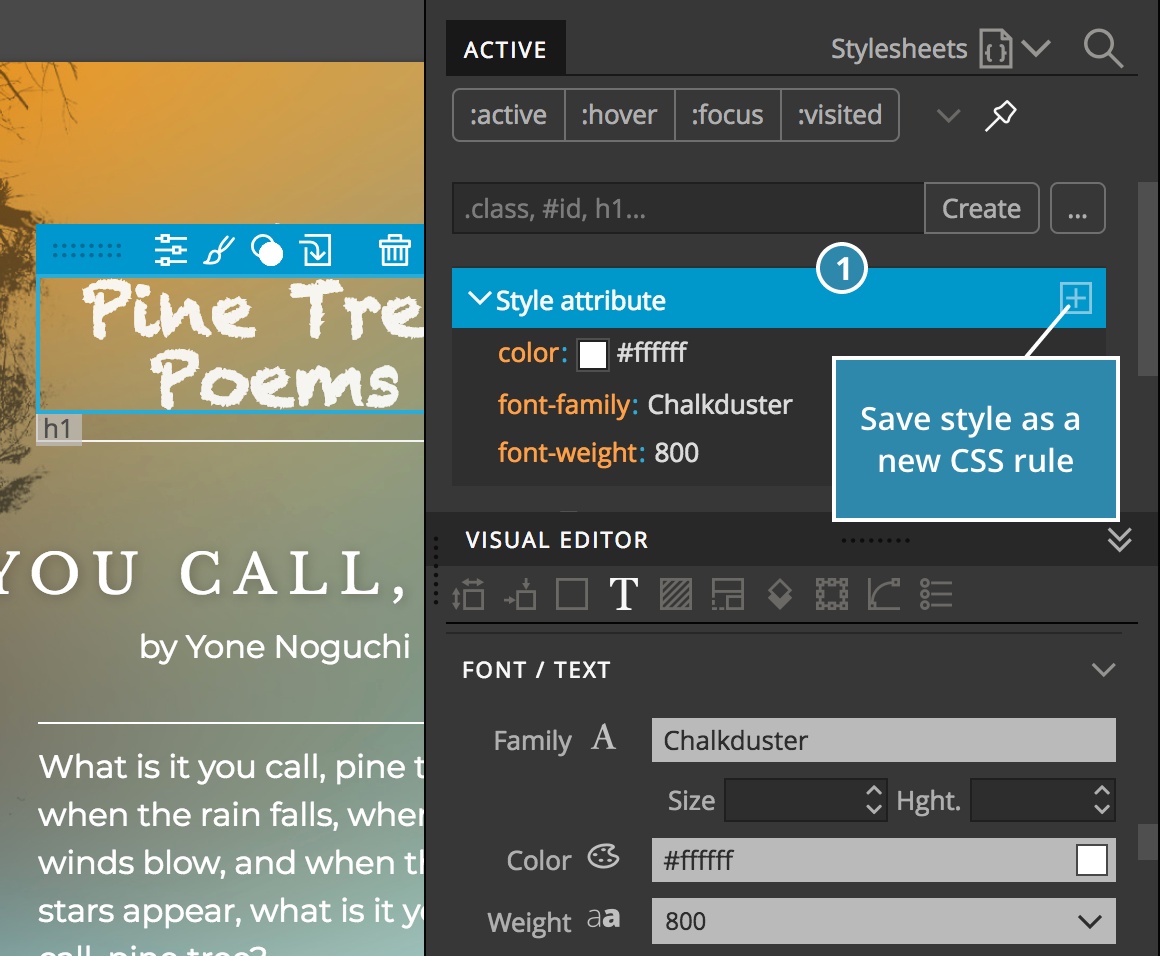
Select a P paragraph on the page. In Style Active panel, select the Style attribute
1 if it is not already selected. -
Set some properties in the Visual editor, for example, text color, size, background color, etc. If you check the Element code panel you’ll see the visual properties stored in the style attribute.
-
Once we’re happy with the style, click on the “Save as a CSS rule”
icon on the Style attribute. The Create CSS rule dialog will open: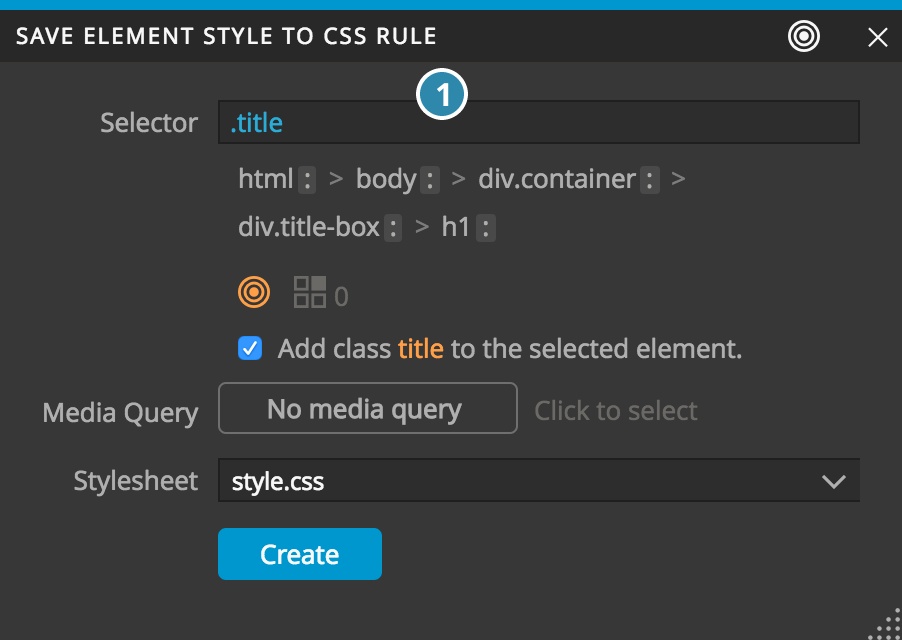
Choose selector and destination for the new rule. -
Enter the new rule name
1 and select the destination stylesheet. Pinegrow will transfer the visual properties from the style attribute to the new rule, and delete the style attribute from the element.
The “Style attribute -> Save as CSS rule” is a very convenient workflow. It lets us jump right into styling the element without first having to figure out what kind of CSS rule we need to create.
The Style panel has a lot more to offer, but for now, let’s leave it and continue exploring Pinegrow.
Text editing
Click on in the toolbar or double click on any text on the page to activate the text editing mode.
The edited element will get a dotted yellow border and a blue text editing menu:
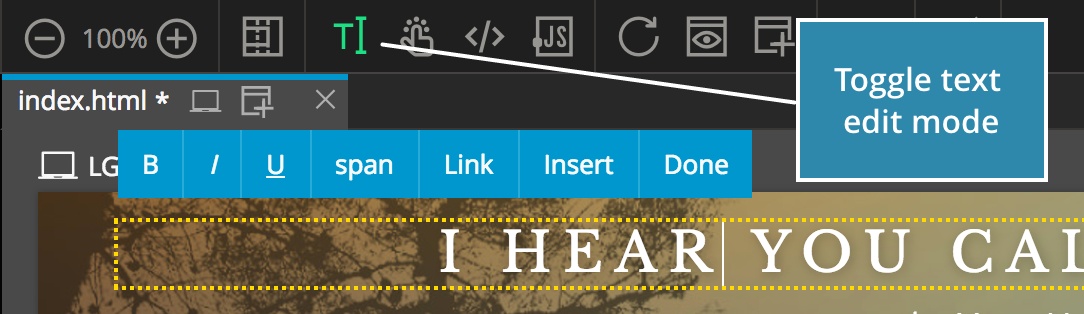
Let’s change some text:
-
double click on the paragraph describing the oldest pine trees. The editing toolbar will appear above the element.
-
Edit the text. Select a word and click
the B icon or press CMD + B. -
Click on the page heading. The text editing mode is still active. Now you can edit the heading text.
-
Click on Done button in the blue text toolbar, press
ESC, or click on the
in the top toolbar to exit the text editing mode.
Note For best results select only the element that you want to edit. For example, if you want to change a button label, just select the button, not the parent container of the button.
Note Use the Element code panel (described next) in situations where Text editing doesn’t do excatelly what you want.
Code editing
Pinegrow is not only a visual website builder - you can use it to work with HTML and CSS code as well.
Note Don’t know HTML? The Element code panel is a great place to learn about code. No scary code soup - instead take a look at different elements one at a time and observe how different editing operations change the code.
Edit the code of one element at the time
Edit element code panel lets you edit the code of individual elements. Instead of dealing with the whole page you focus only on the relevant parts of the code.
Open the Element code panel.
Let’s get coding!
-
Select a paragraph or any other element on the page. Its code will appear in the code editor. Try changing the text. The change is immediately seen on the page.
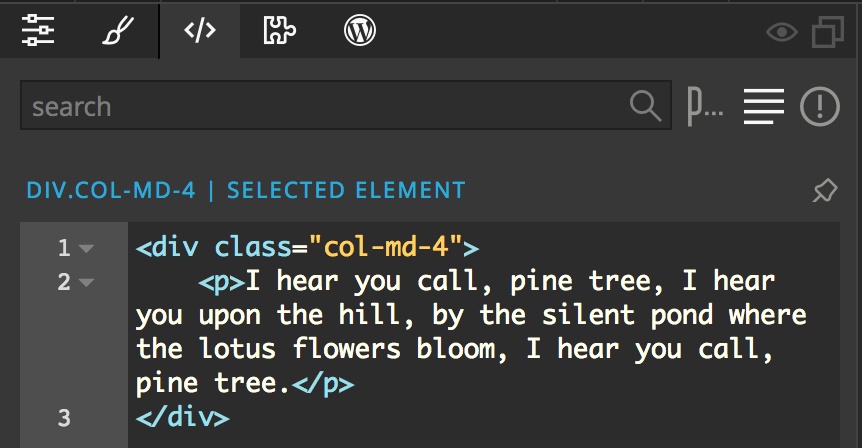
Edit the code of the selected element. -
Switch to simplified code syntax by clicking on the
icon. The simplified syntax is sometimes easier to edit, and it is less prone to errors. Note, this syntax is only used for editing. Normal HTML code will be used on the page.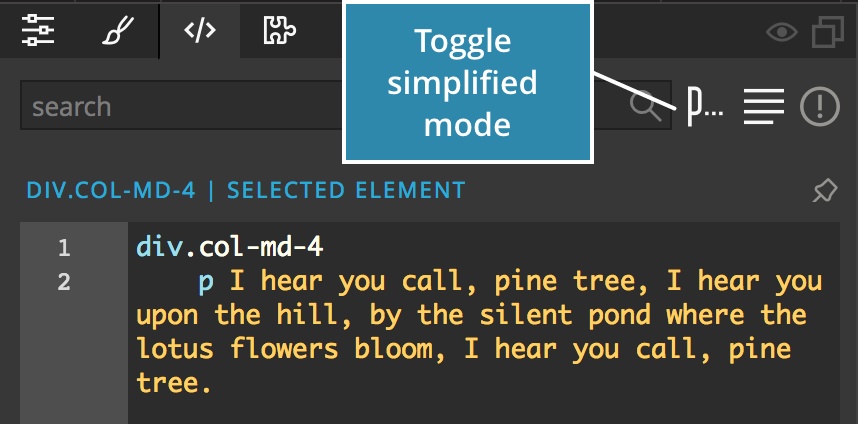
Simplified code syntax.
Page code editor
Use the page code editor to edit the code of the whole page.
Open the Page code panel.
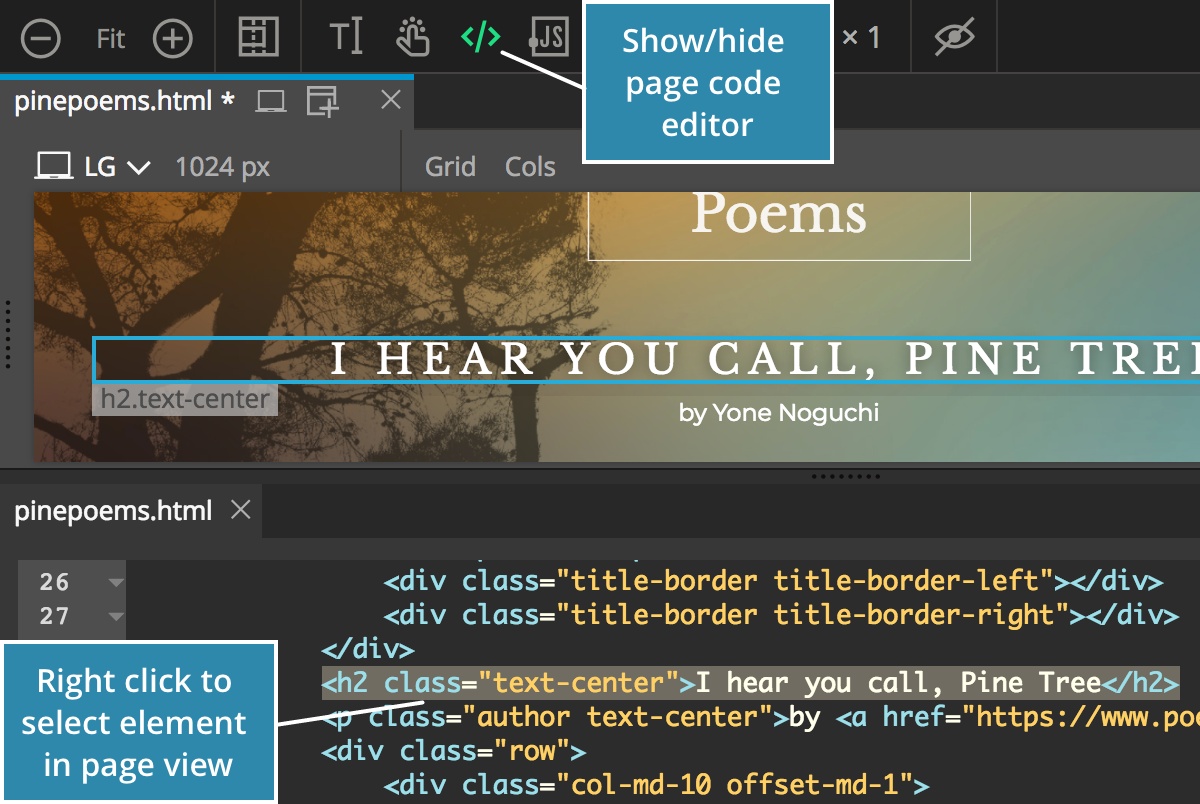
Note that simplified syntax mode is not available in the page code editor.
Let’s edit the code of the whole page:
-
Select an element (h1, for example) on the page. Notice that the element also got highlighted in the page code editor.
-
Change the text of h1 in the code editor. The change appears in page view as well.
-
Right click on an element in the code editor. The element will get selected in the page view.
Note The editor is also used for editing CSS code and Javascript files.
Speed-up your work
Select multiple elements
Most editing operations in Pinegrow can be done on more selected elements at the same time. This is a great time saver.
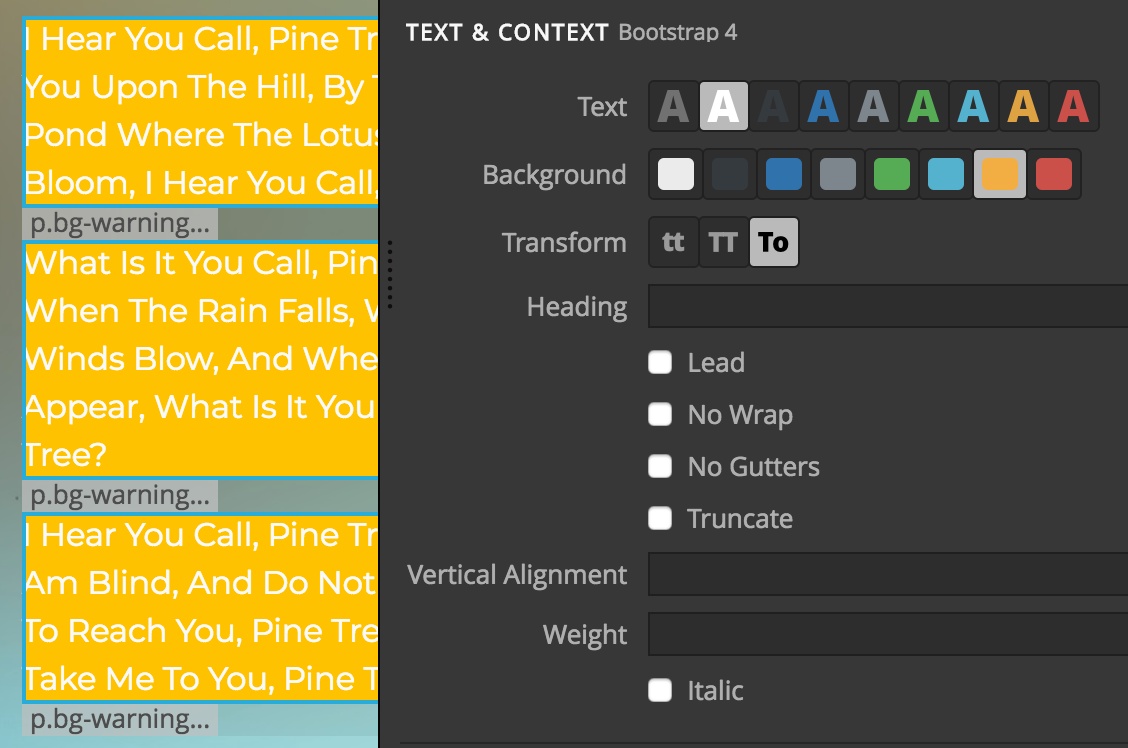
To select multiple elements:
- CMD + click on elements on the page or in the tree.
- SHIFT + click to select a range of elements on the same level.
Do editing operations on multiple elements:
-
Select a couple of elements on the page by
CMD clicking on them. -
Now you can duplicate or delete all of the selected elements with one operation. You can also change their properties and so on.
-
Press
ESC to deselect all elements.
Work with multiple page views
Each page can have multiple page views showing the page at different sizes and in different devices.
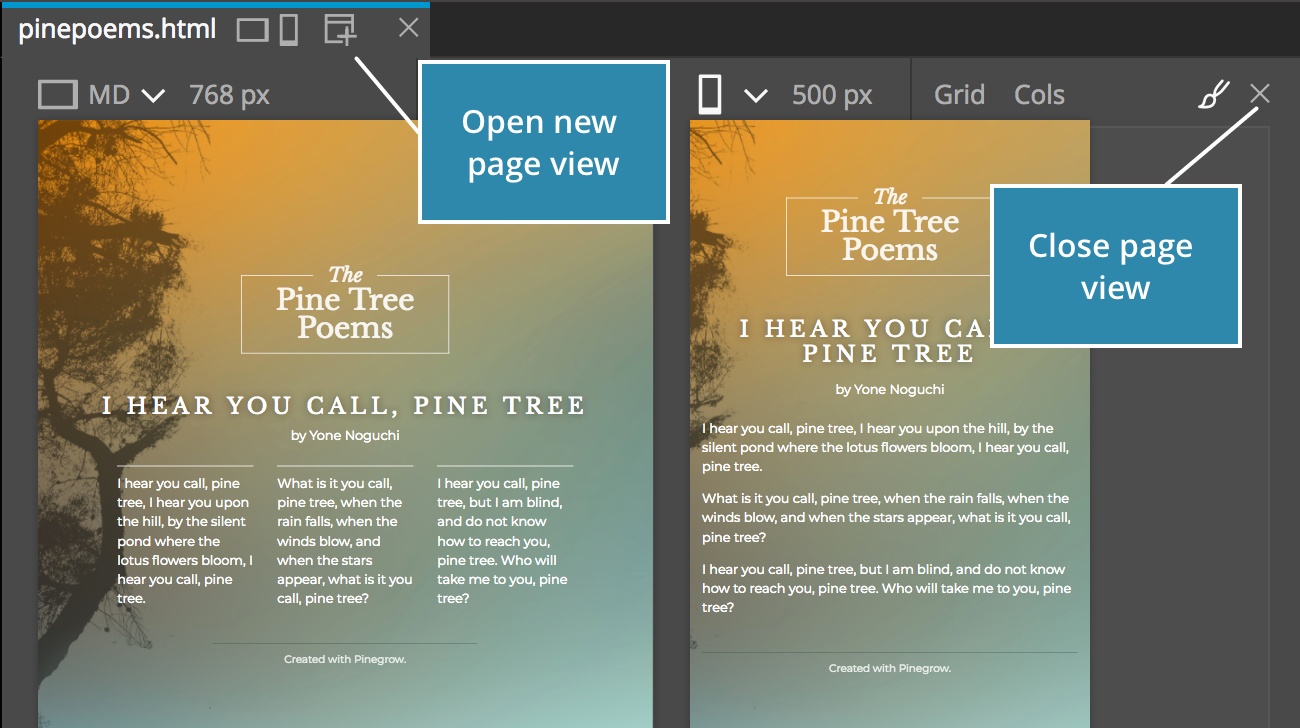
Play around with page views:
-
Open another page view by clicking on the
Add page view icon. -
Move the mouse over the two page views. Notice that hovered elements get highlighted (with green border) in both views.
-
Click on any element on the page. The element will get selected in both page views.
Use the Repeater
The Repeater is a handy feature that lets you repeat a single command many times.
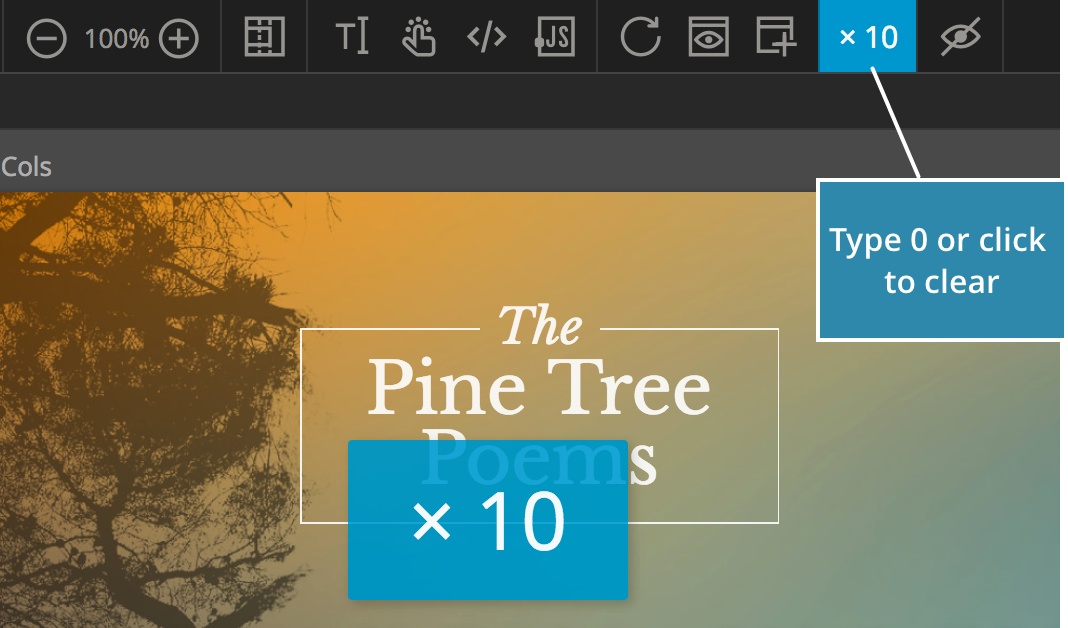
Let’s repeat some stuff:
-
Select an element on the page.
-
Make sure you’re not in Text editing mode
. The Repeater doesn’t work there. -
Type a number, for example 10. Note, there is no input box for that, just press “1” and “0”.
-
Click on Duplicate
on the selected element. 10 copies of the element will be created.
Pinegrow PRO & WordPress
So far we explored features available in all editions of Pinegrow. Let’s take a quick look at what we can do with Pinegrow PRO and with WordPress Theme Builder.
Project panel
Open the Project panel.
Note Projects are a part of the Pinegrow PRO edition.
Pinegrow projects are plain-old file folders. Just open a folder as a project, and you’ll see a list of all files and subfolders here.
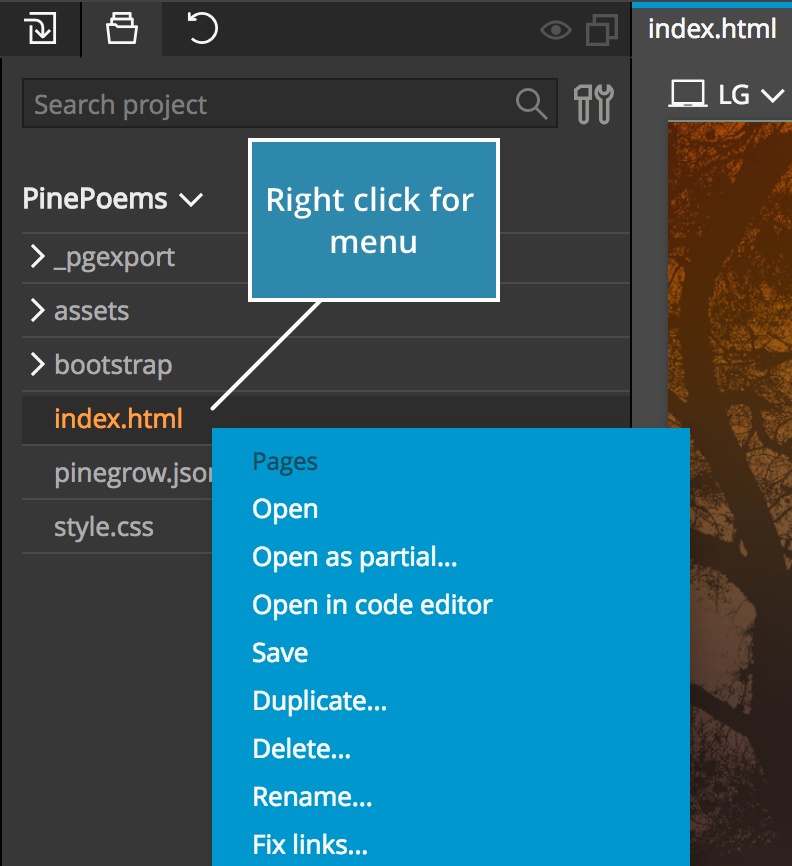
Let’s create a project:
-
Select
File › Save from the top menu or press
CMD +
S and save the sample page into a new folder on your computer. -
After the page is saved, Pinegrow will offer to open the folder as a project. Say Yes and take a look at the Project panel.
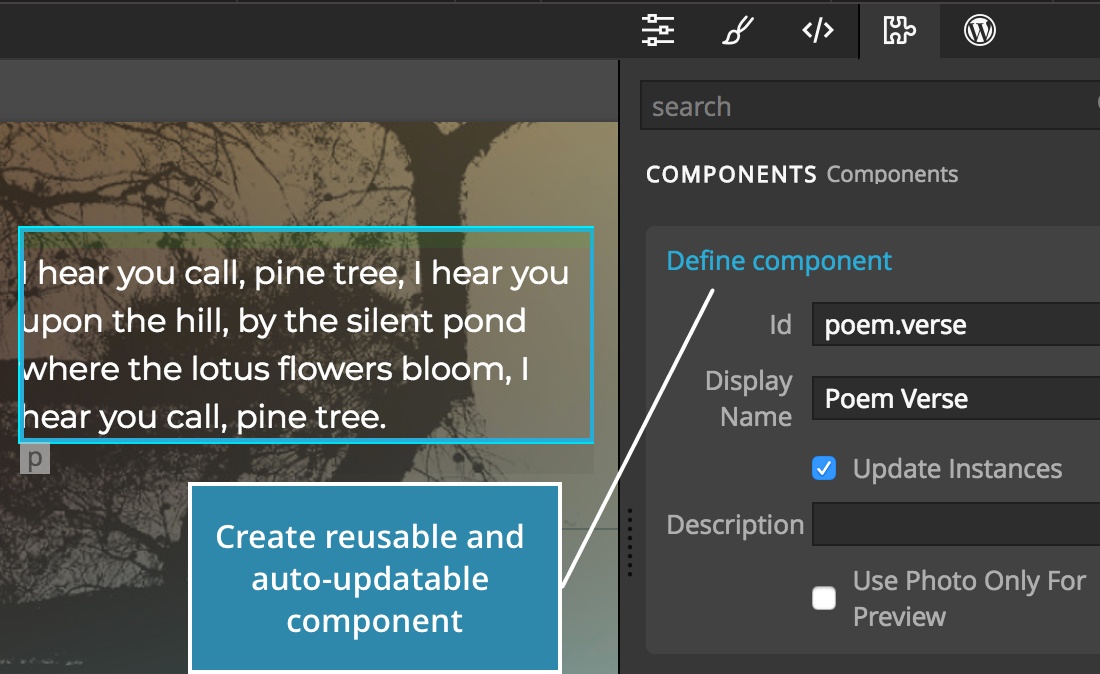
Master pages, smart components and editable areas
Open the Actions panel.
Note These features are available in Pinegrow PRO edition.
Actions panel lets you create Smart components, Master pages, Editable areas and more. Select one or more elements on the page and assign an action (behavior) to them. These features are available in Pinegrow PRO edition.
Creating WordPress themes
Open the WordPress panel.
Note WordPress theme builder is available in Pinegrow with WordPress Theme Builder edition.
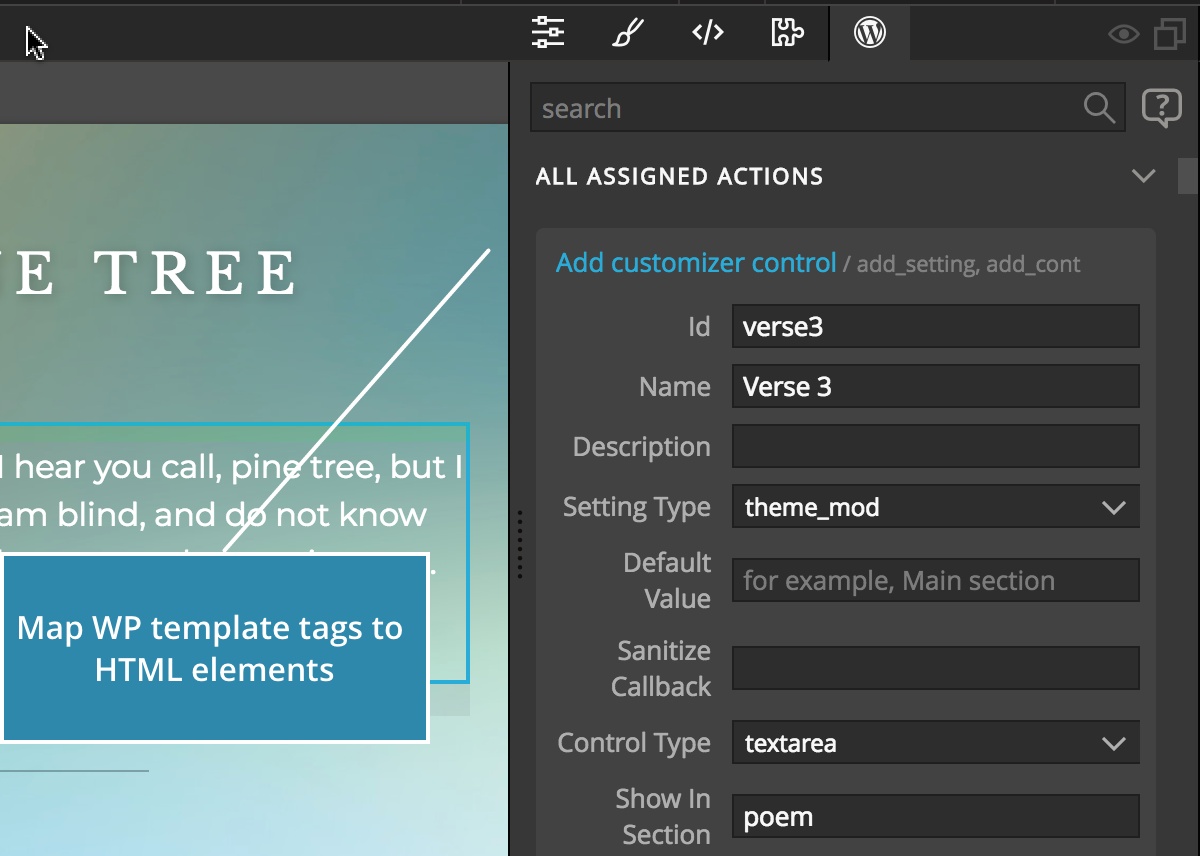
Use WordPress panel to convert the HTML project into a PHP-based standard WordPress theme. This feature is available in Pinegrow with WordPress theme builder.
You did it!
Congratulations! Now you know what Pinegrow is about and how to use it.
There are many features that we didn’t mention here. Almost every panel & tool has a bunch of tricks up its sleeve that can help you to be more productive. Start using Pinegrow and check the rest of the documentation to learn more.