
Live Designer module of Pinegrow Vite Plugin enables visual editing of Vue Single-File Components (SFC) in Vue Designer.
DocsVue DesignerDocsVue Designer2023-07-06
Vite
Let’s scaffold a new Vue project with Tailwind CSS by following the official documentation and opening it in Vue Designer. We highly recommend following this guide step-by-step.
You can watch our short guide, or scroll down past the video for step-by-step instructions.
Click on Tailwind CSS in the Start a new project dialog to open the official documentation.
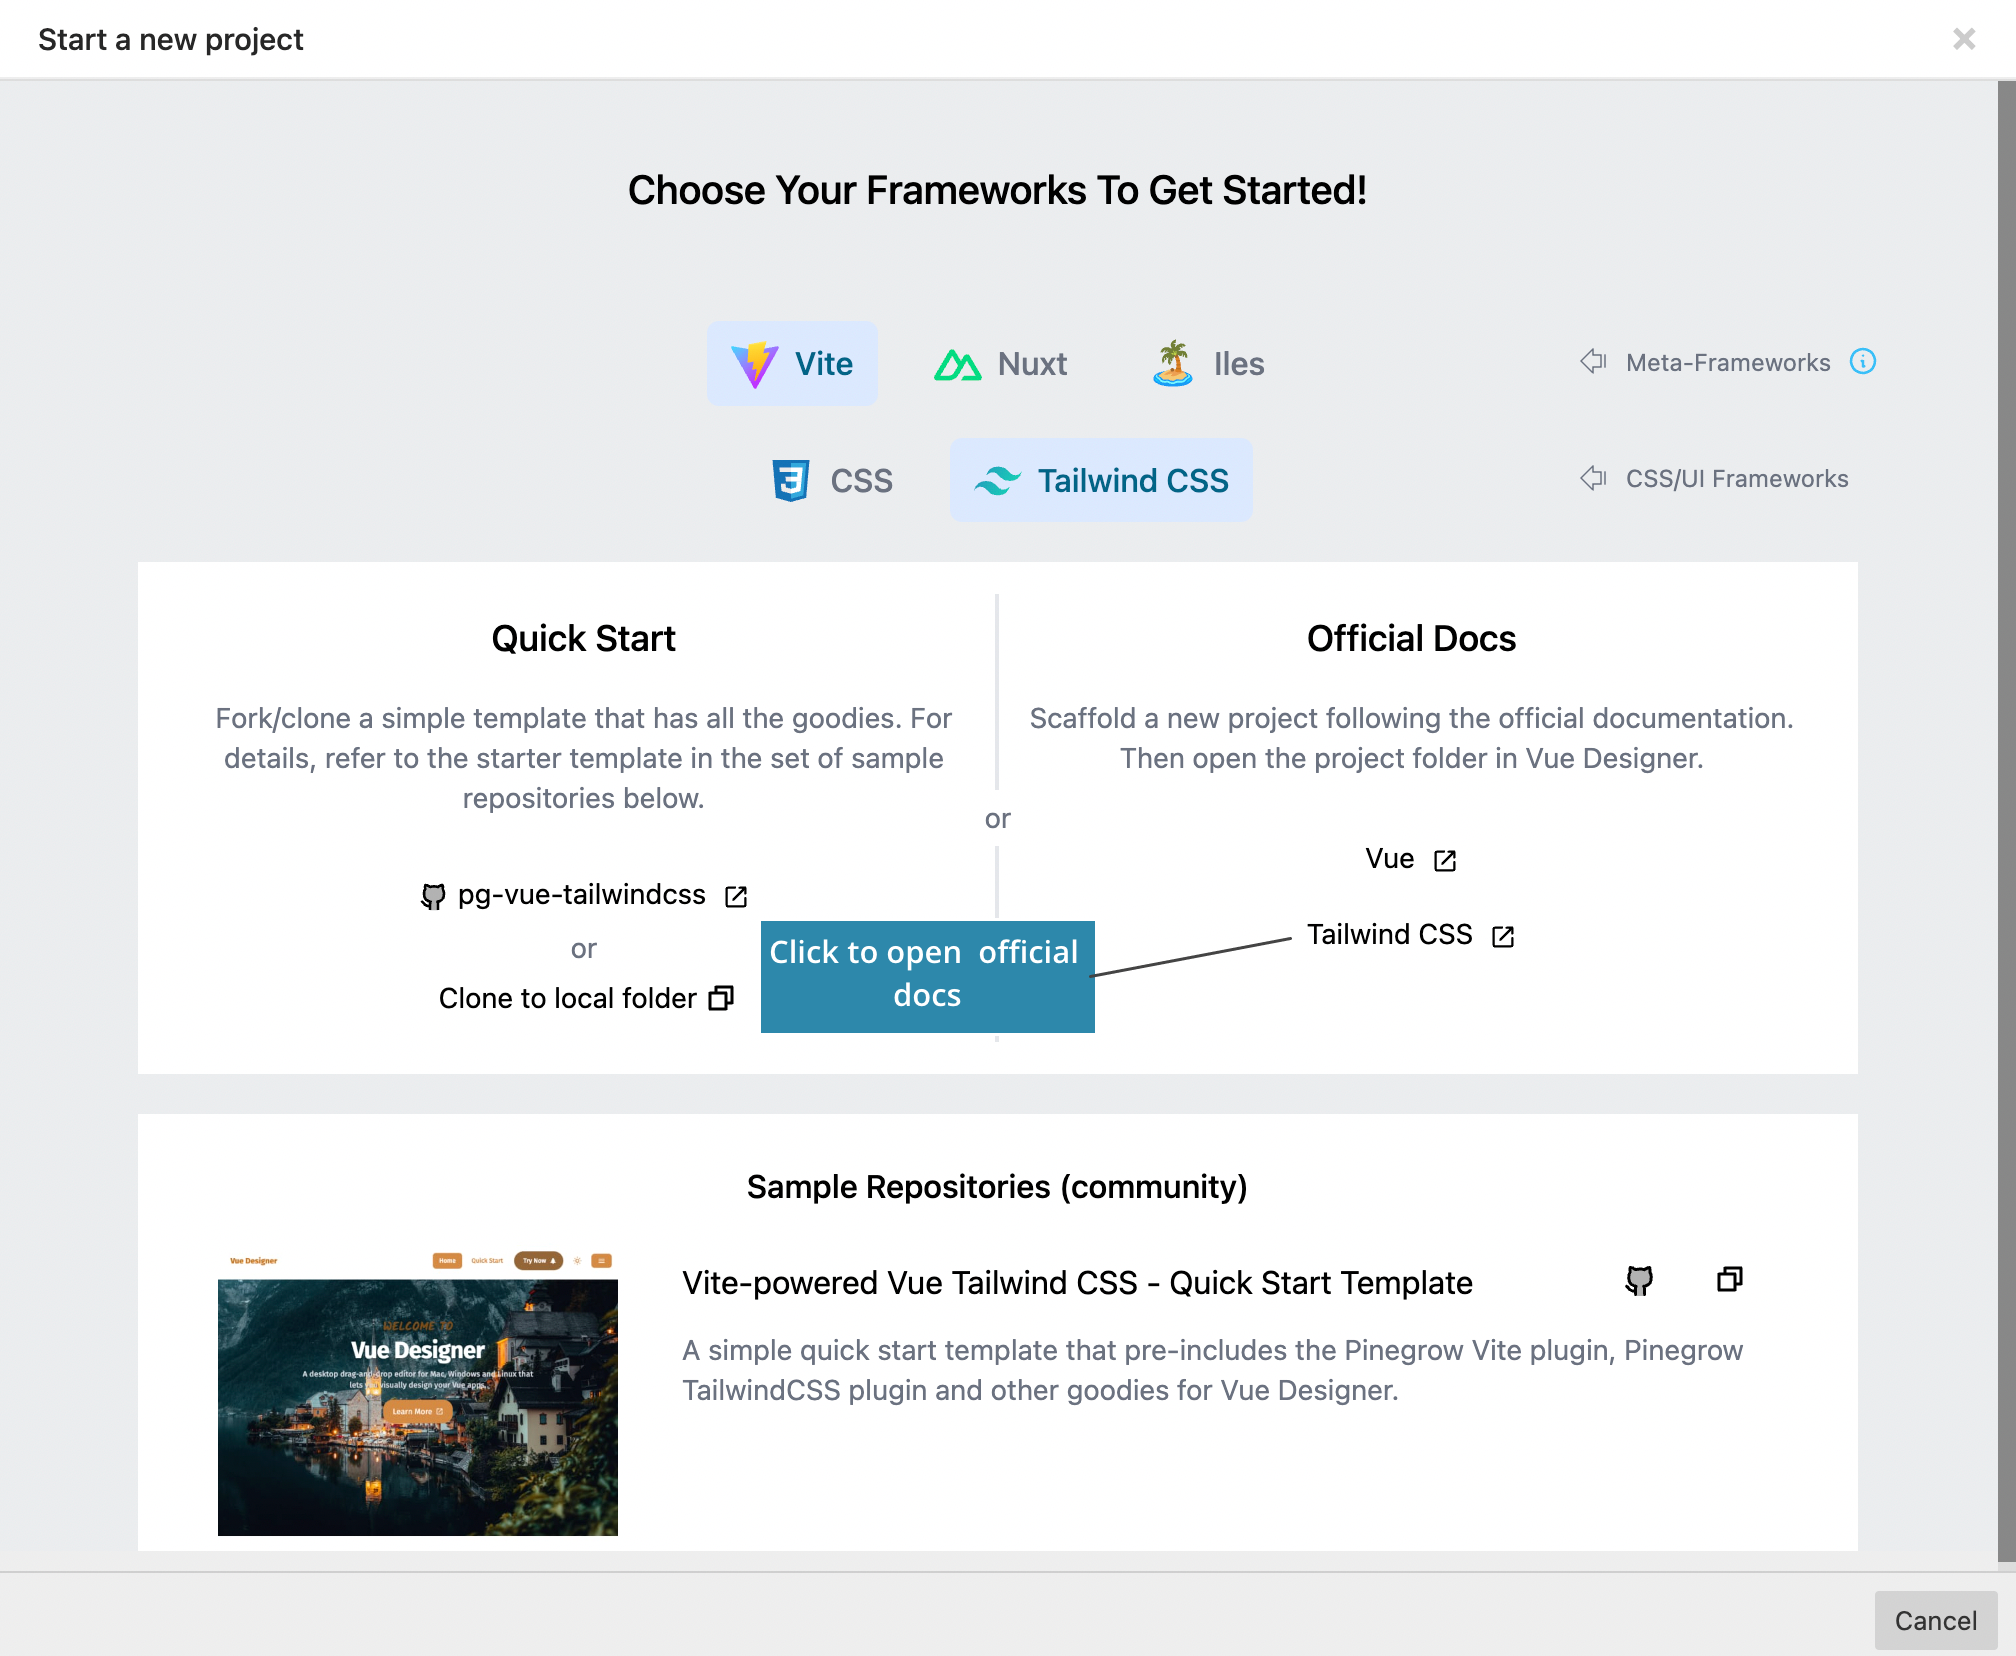
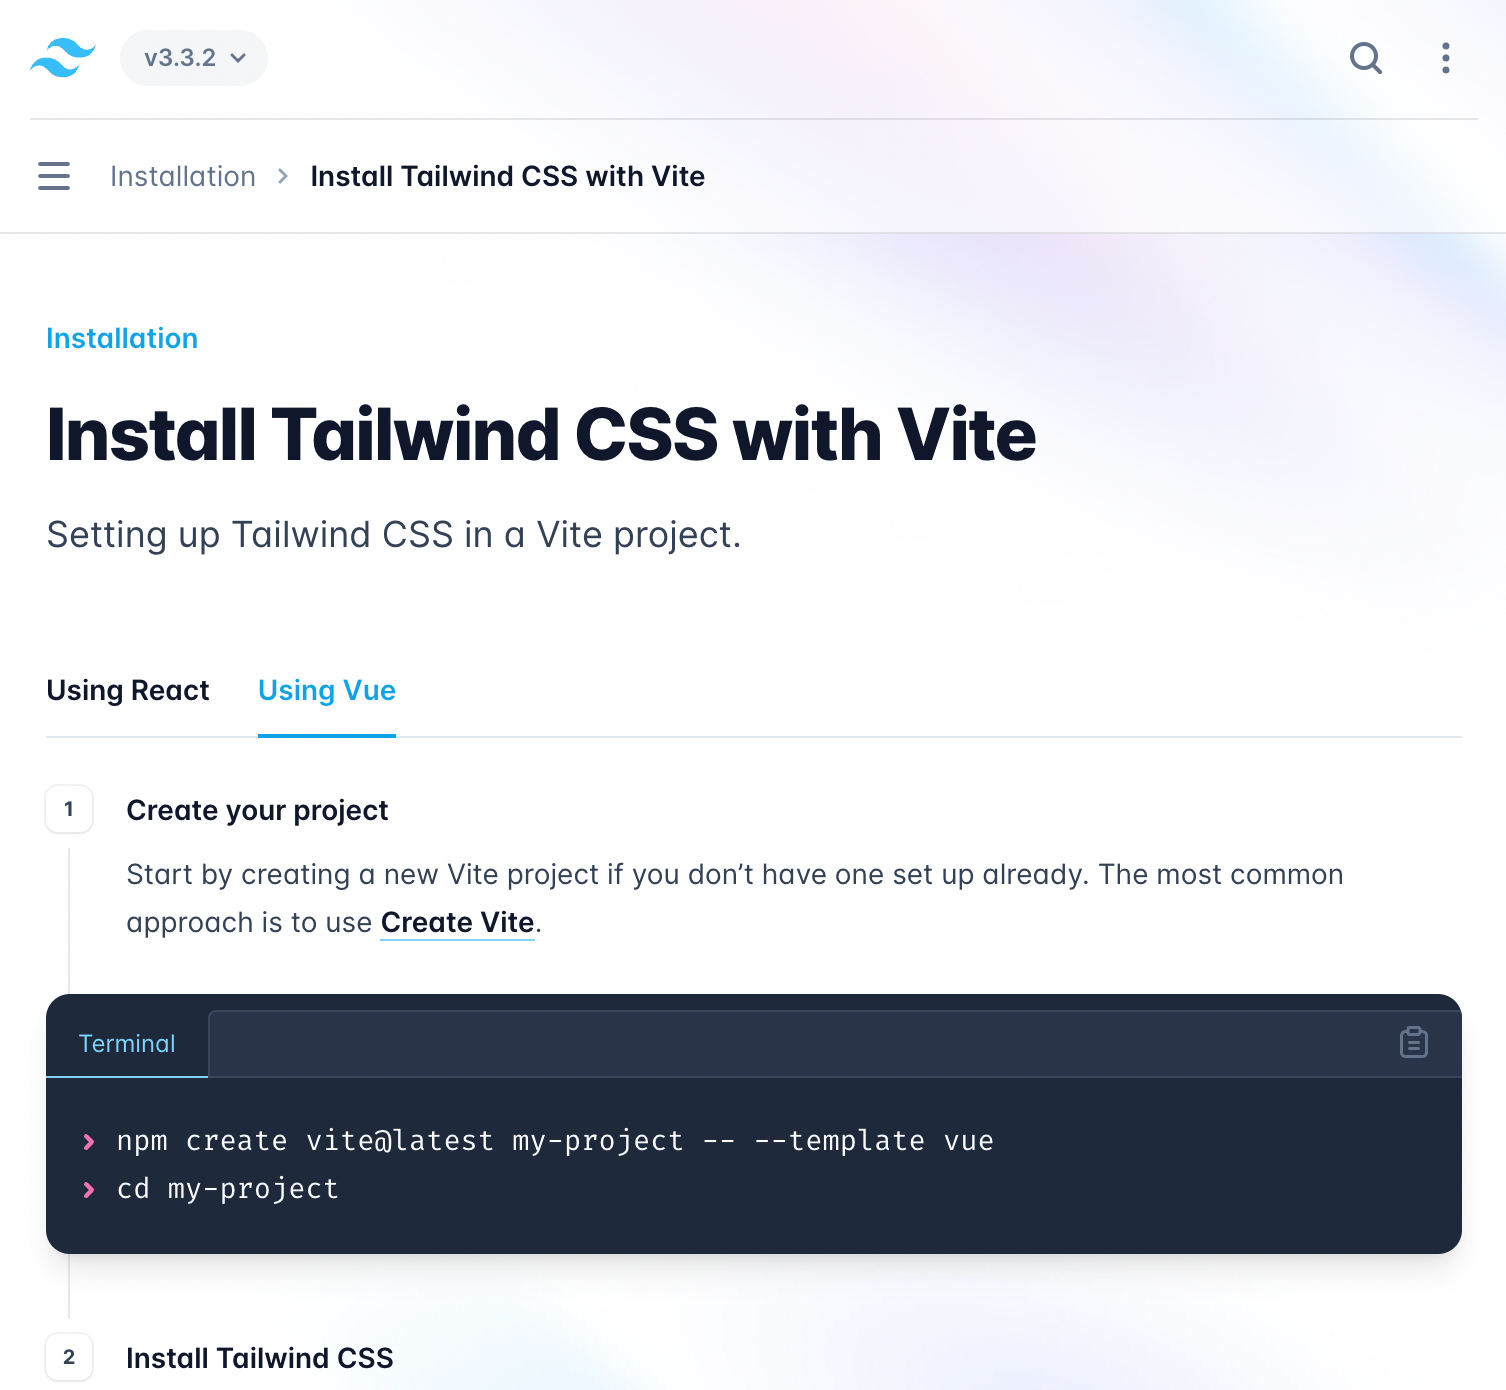
Follow the instructions in the official documentation to create a new Vite-powered Vue project with Tailwind CSS.
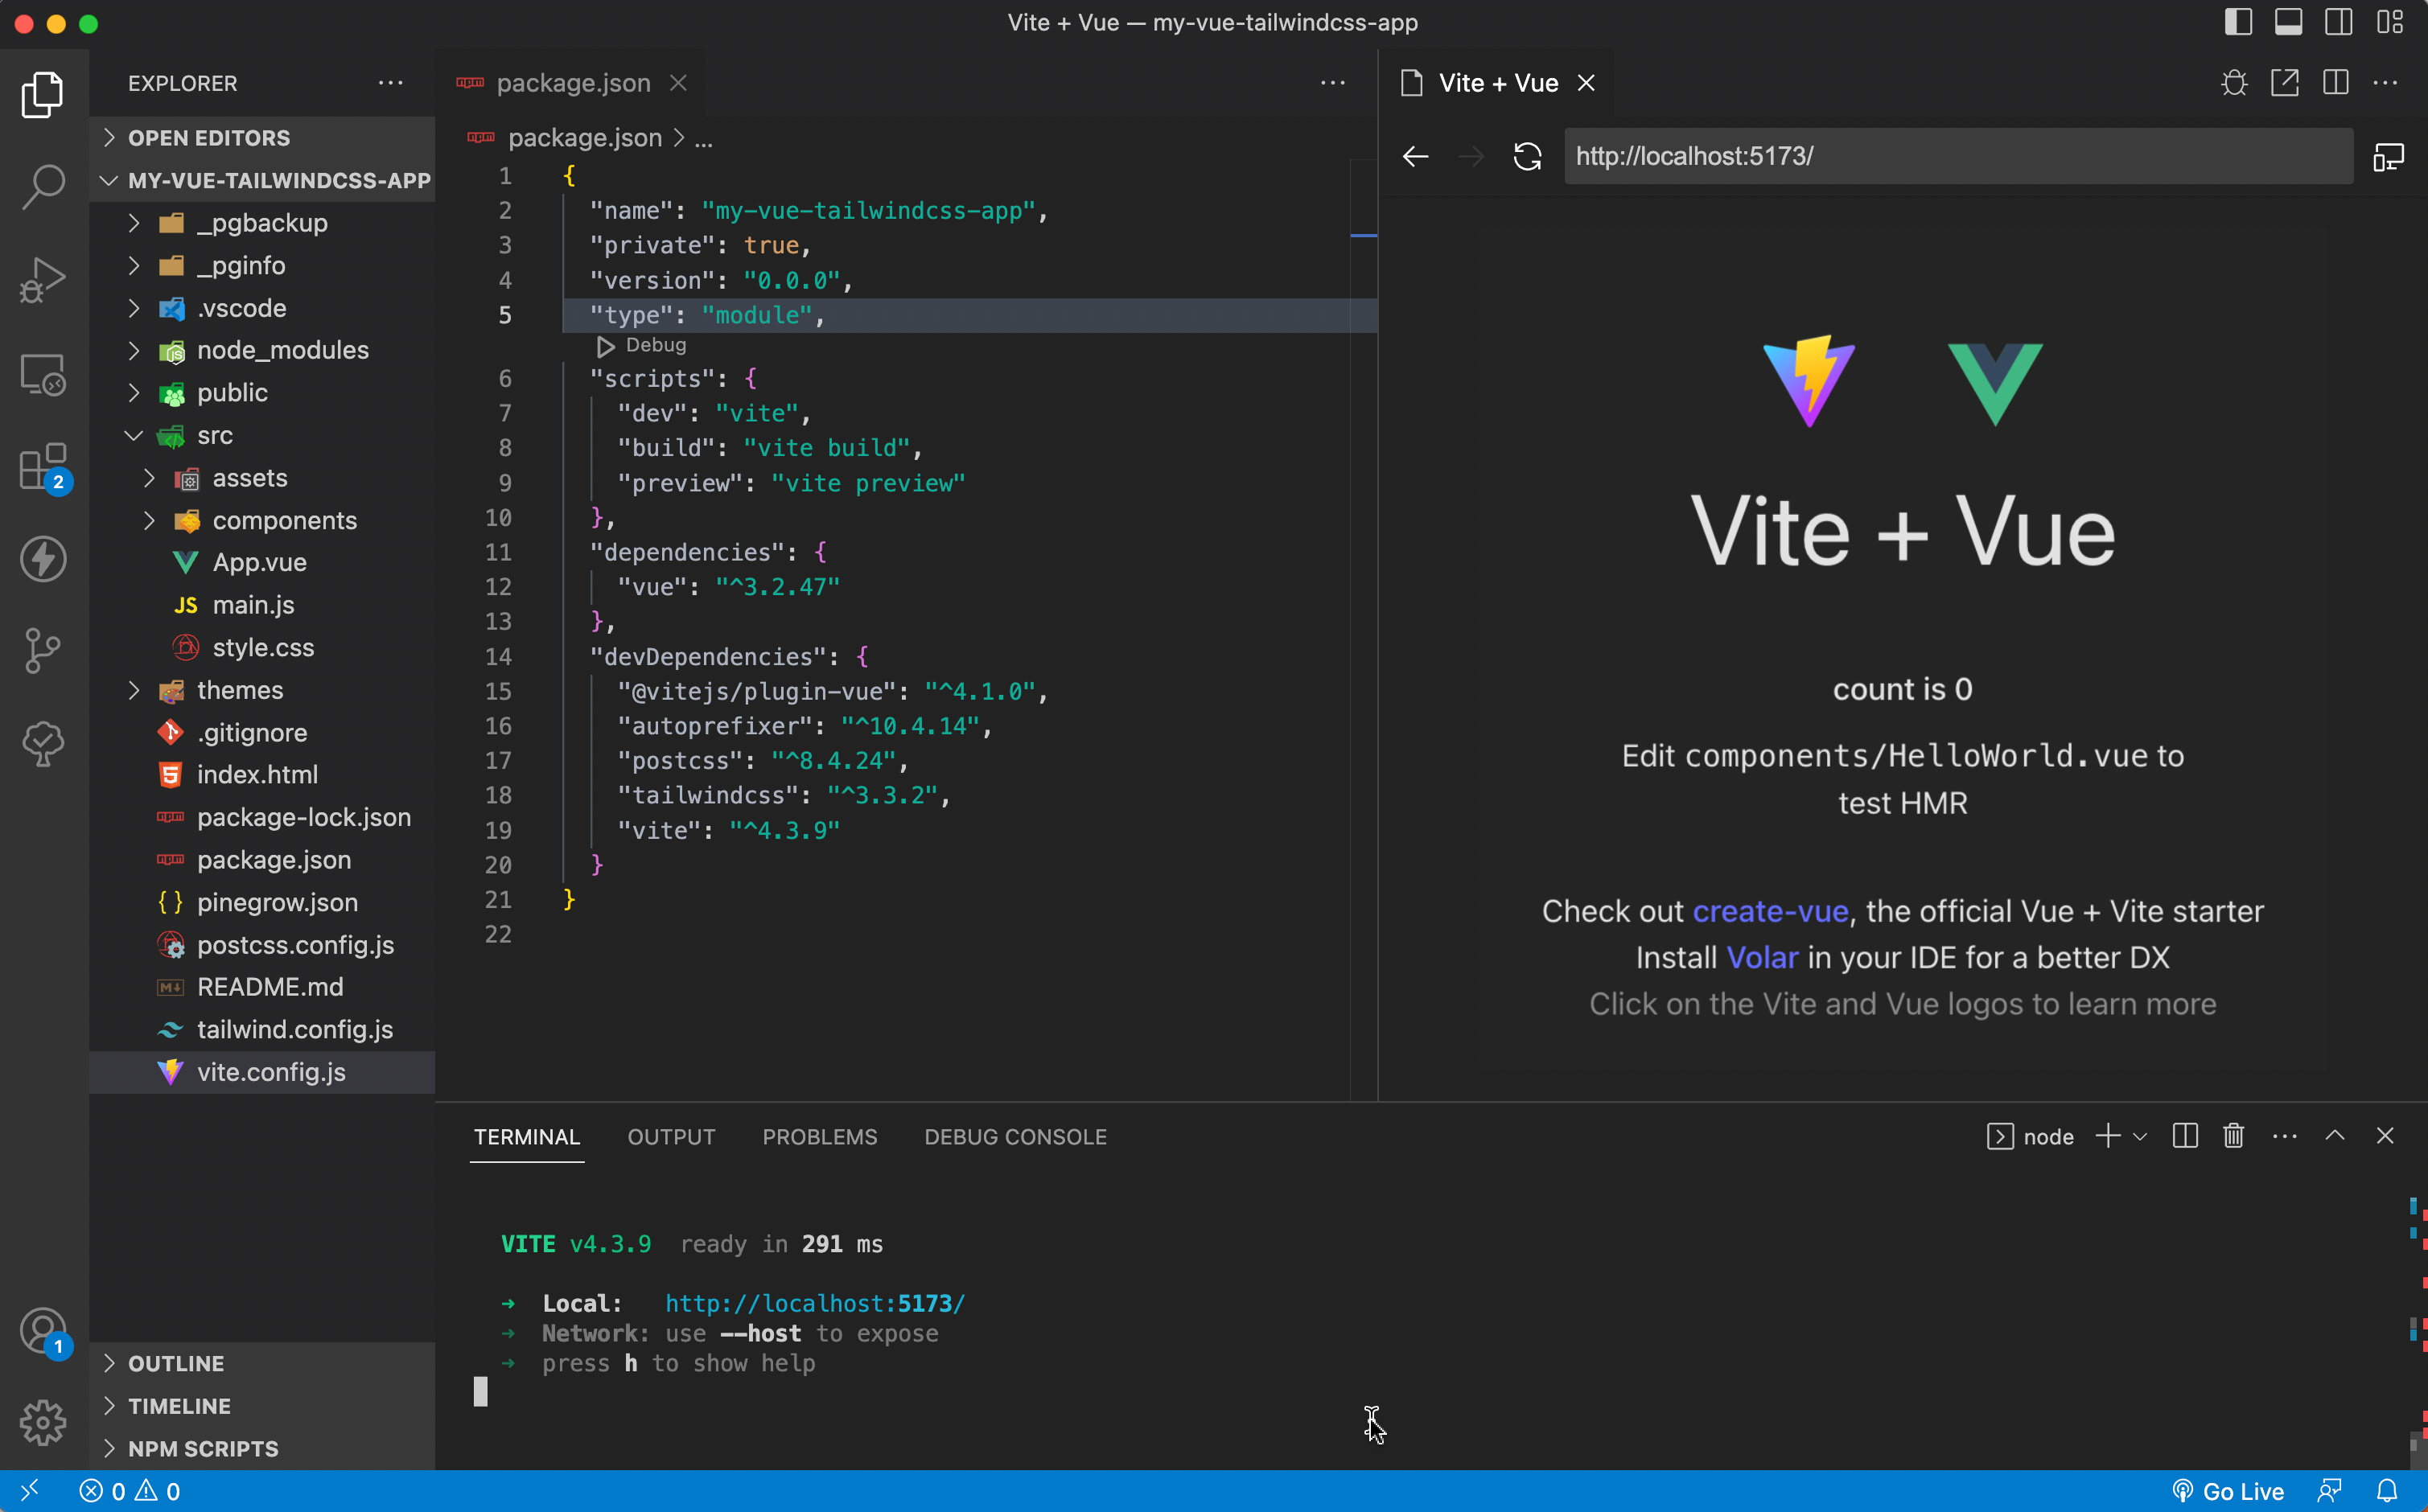
Here is an example of a scaffolded project with the dev-server already running.
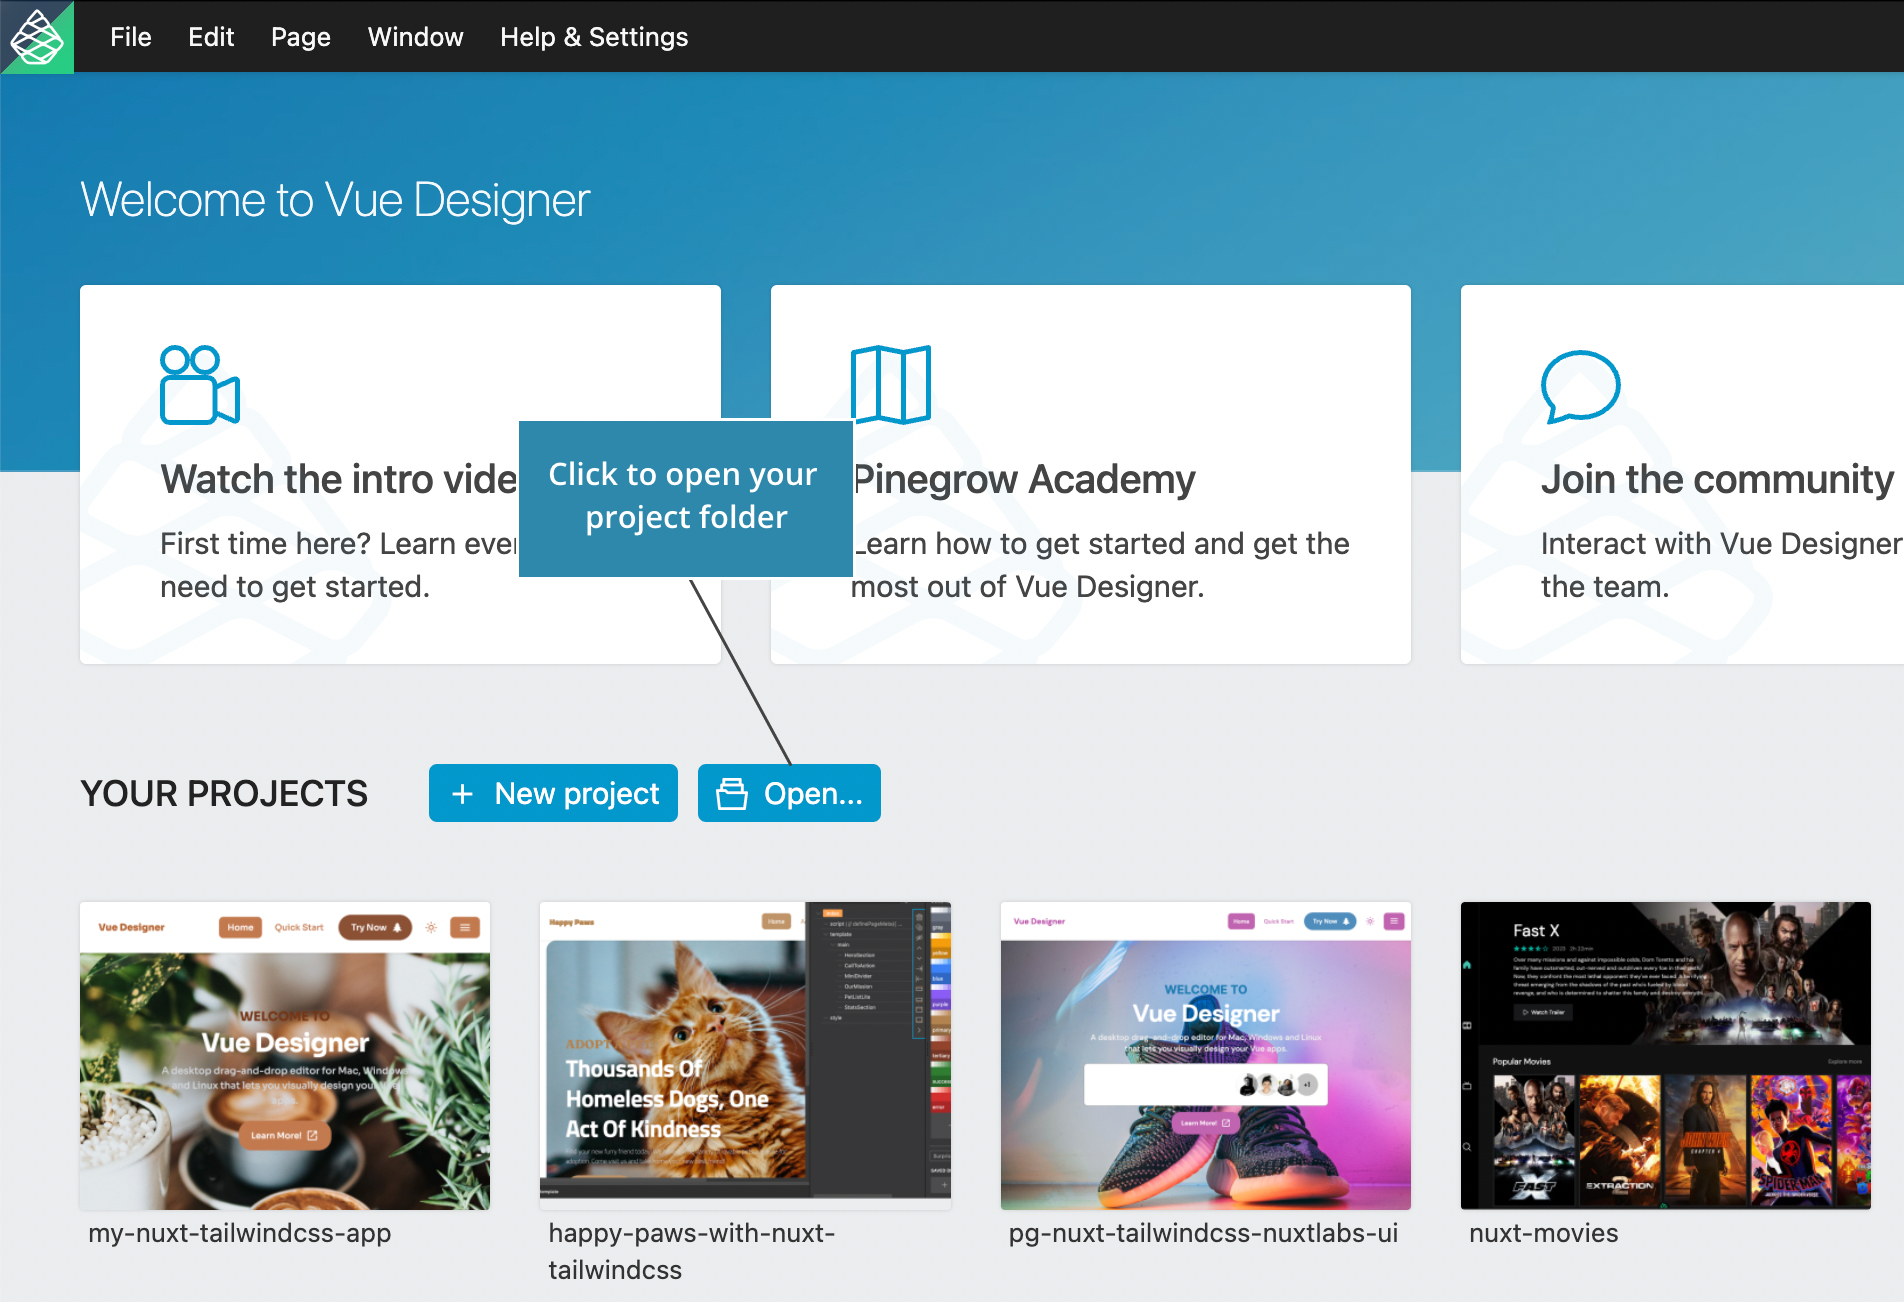
Now, click the Open button to open your newly created project folder in Vue Designer.
Setup
The Config Panel will automatically pop-out with instructions to add the Pinegrow Vite Plugin to your Vite config.
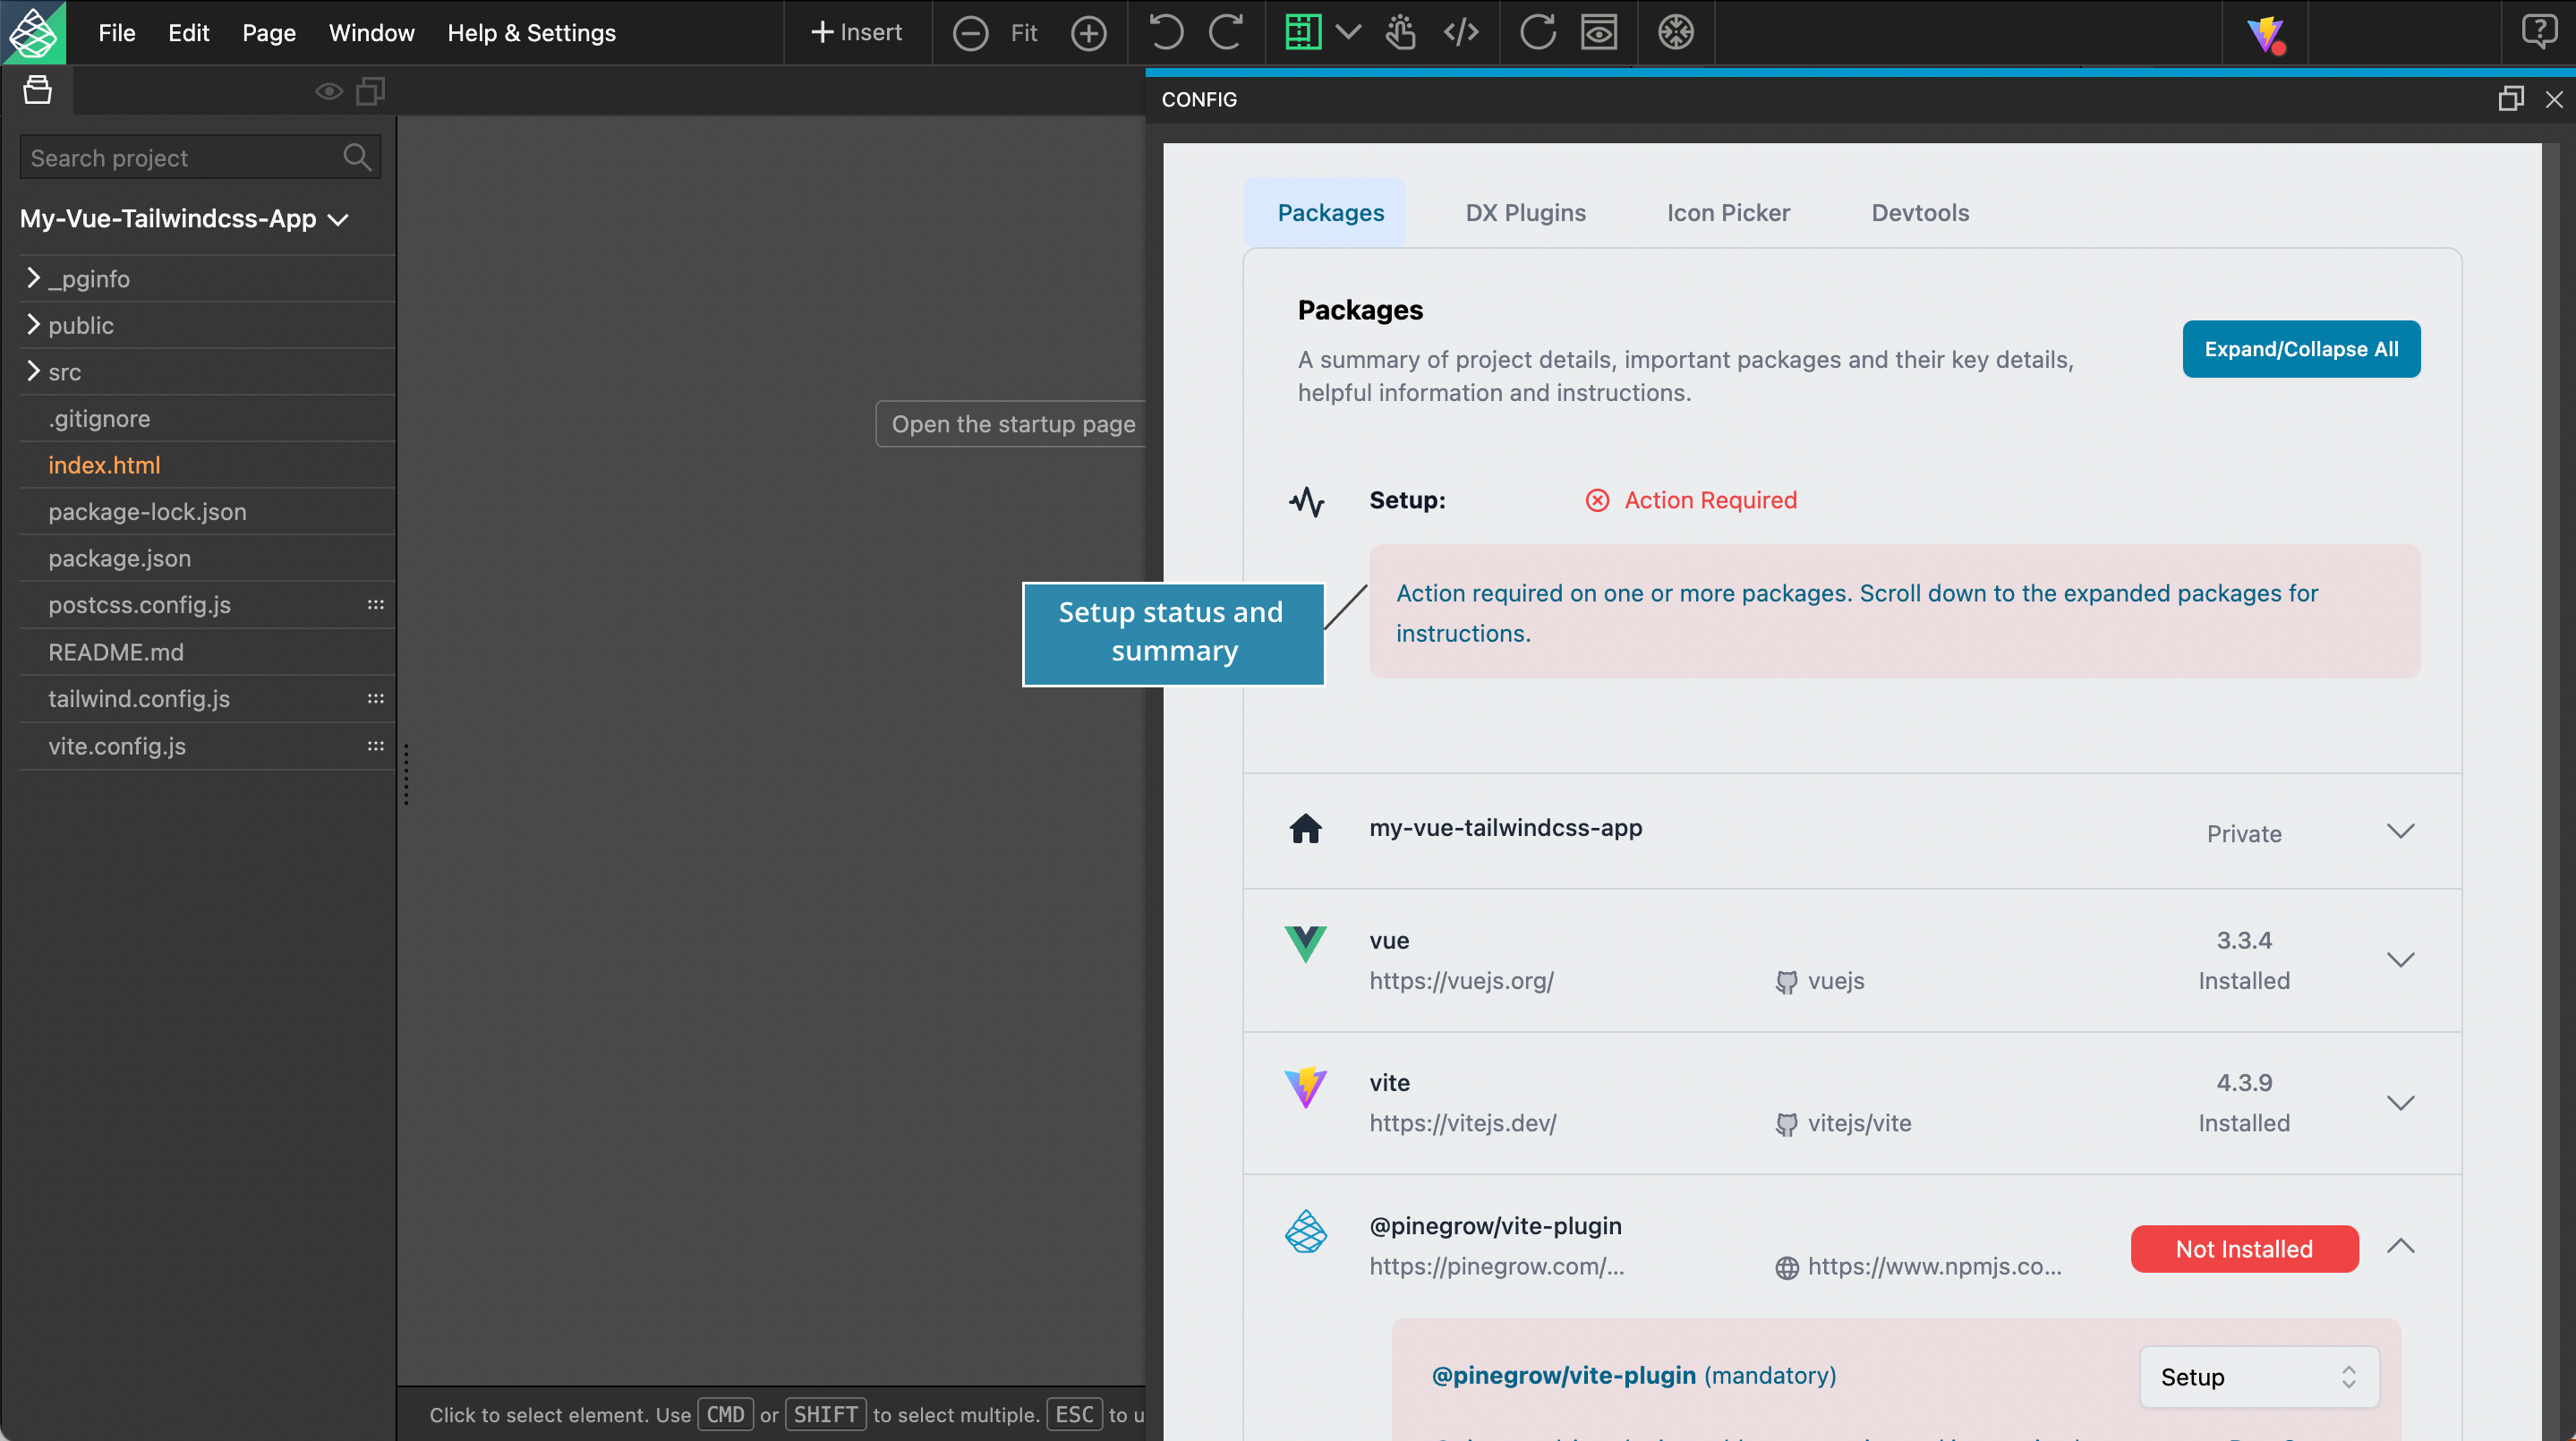
Scroll down if needed and follow the instructions to install and configure the plugin.
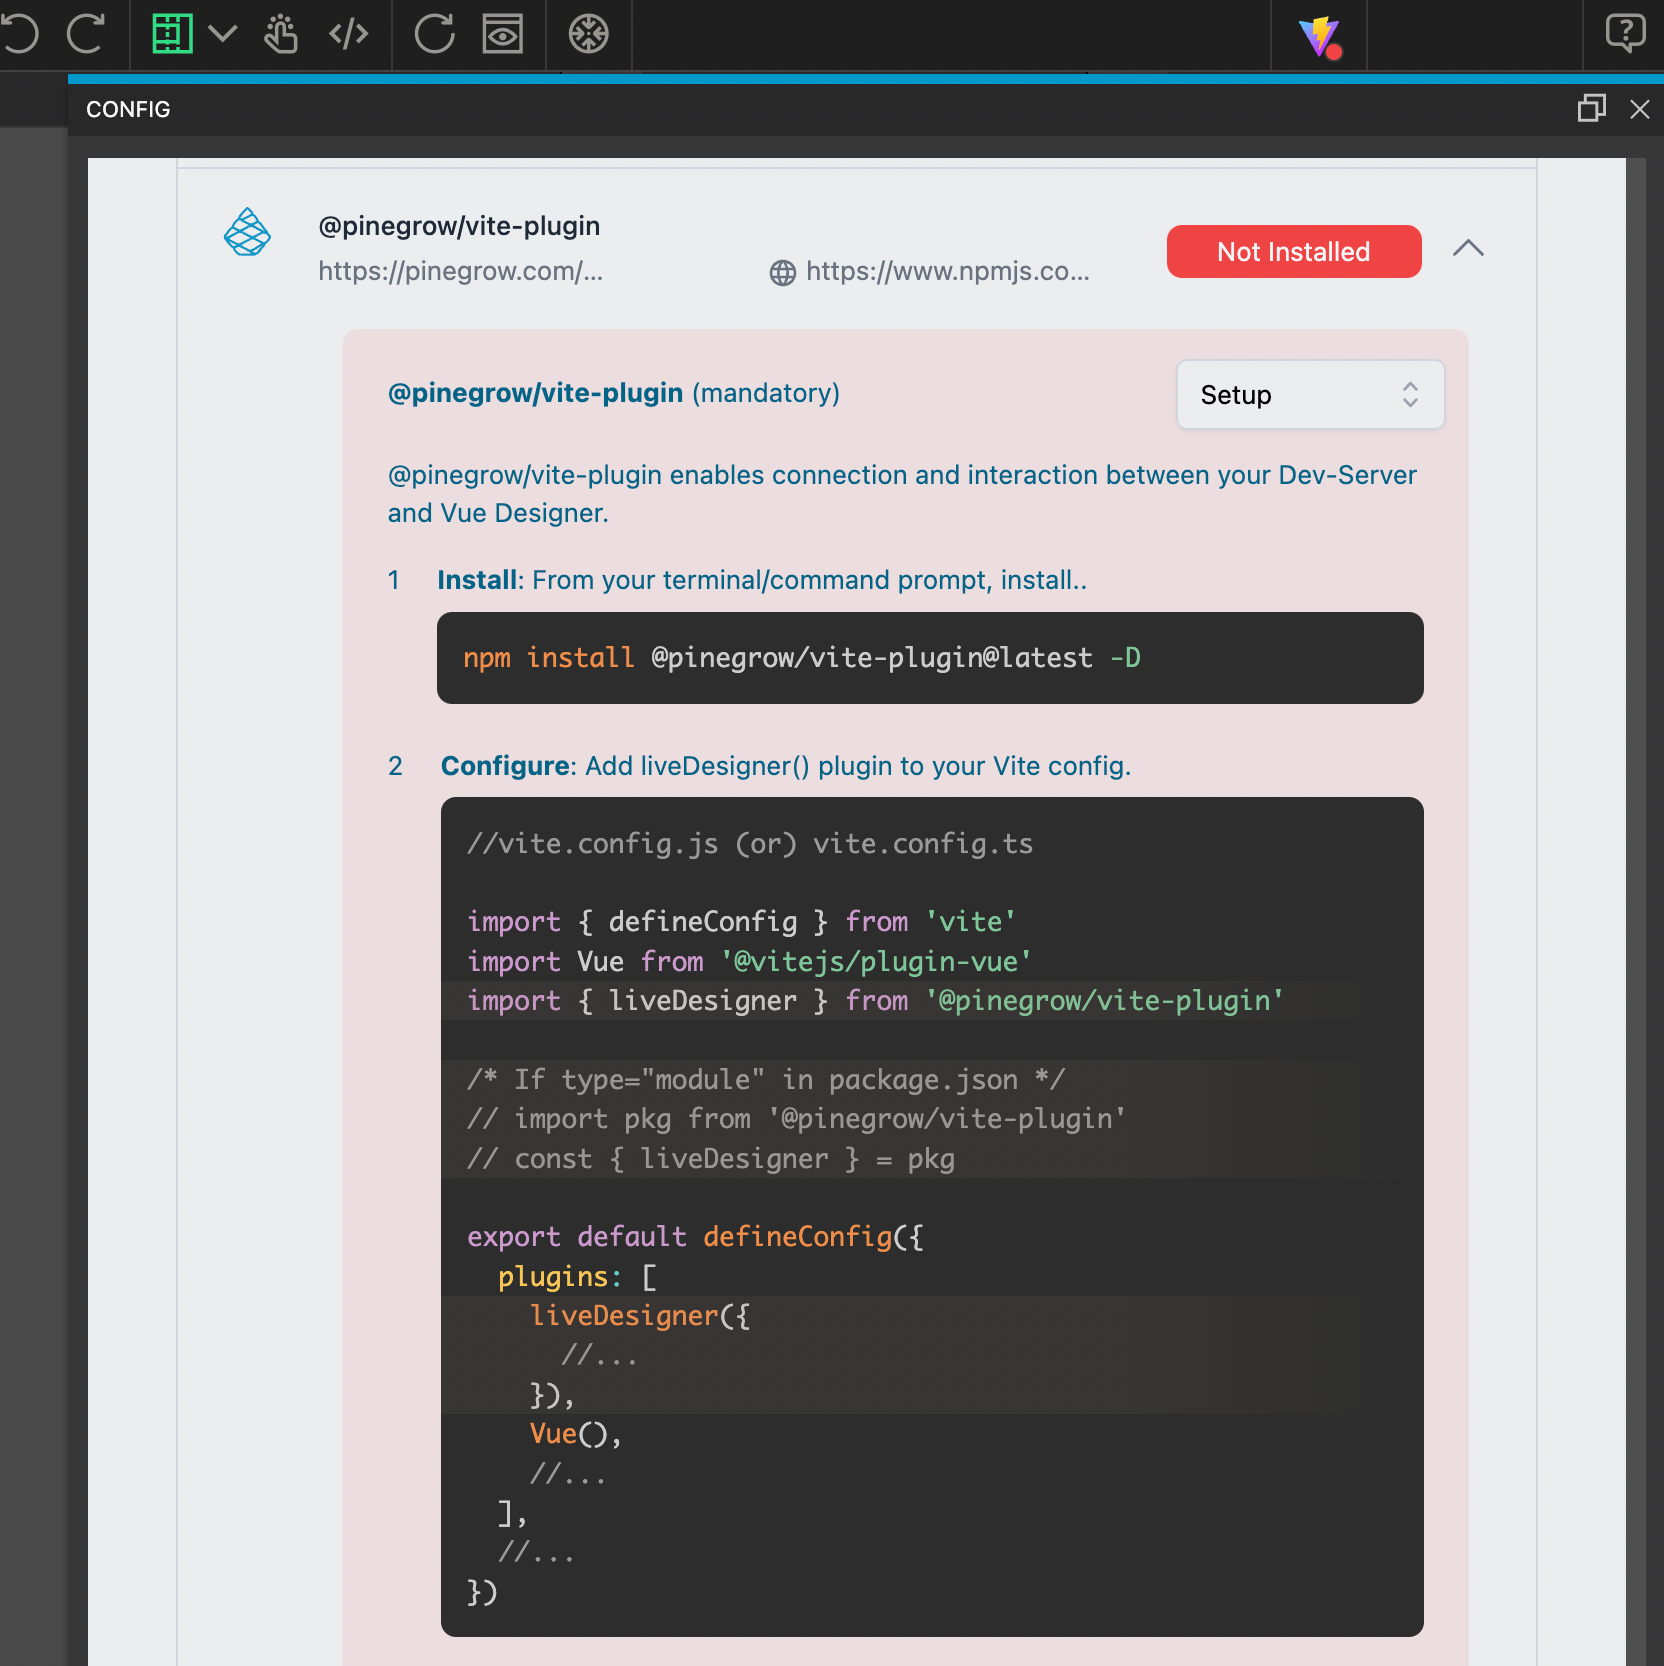
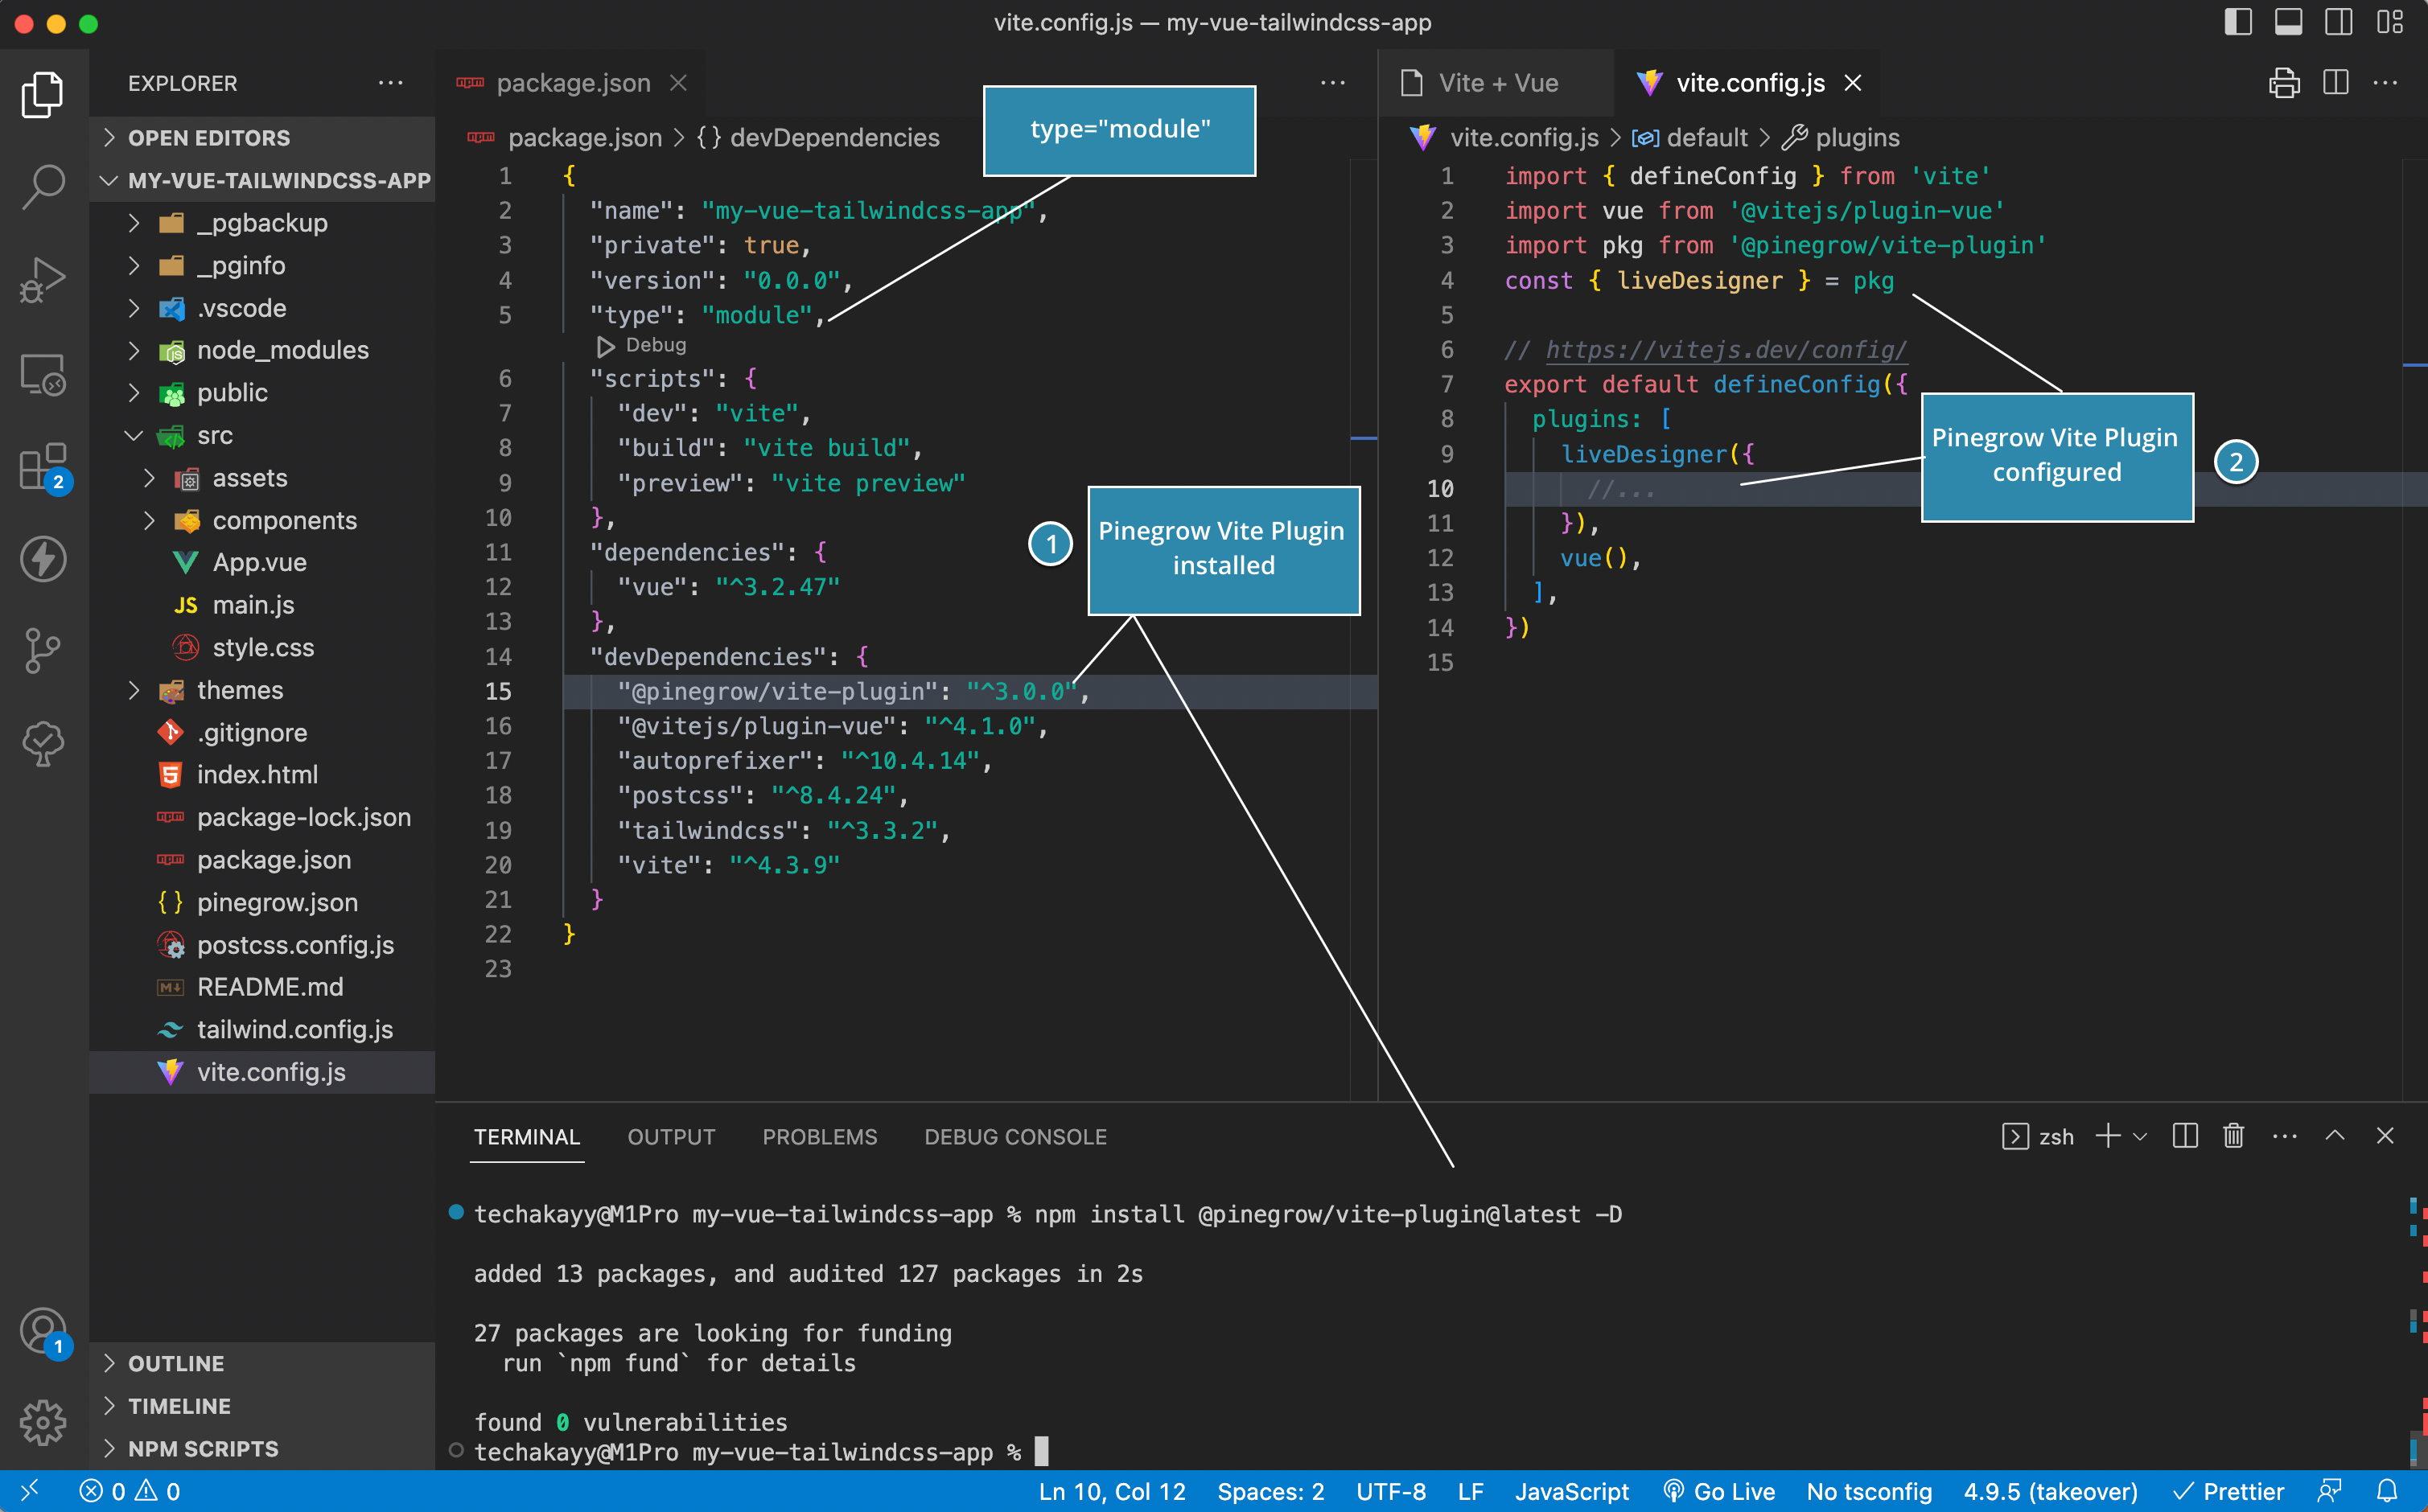
liveDesigner module
liveDesigner module of the Pinegrow Vite Plugin uses Vite’s handleHotUpdate hook to feed your Vue Components opened in Vue Designer with tags enriched with unique IDs (generated within Vue Designer) to establish source-dom mapping which enables the visual editing capability.
The liveDesigner module takes the following options (all are optional). For detailed usage, refer to the @pinegrow/vite-plugin npm package (types enabled) and instructions displayed in the Config Panel.
repoRoot- Defaults to the project root. You set this when your project is part of a mono-repo.
configPath- Defaults to standard config filenames. You set this when using a custom config filename, for eg., vite-dev.config.ts.
devtoolsKey- A key exposed on the app’s windows object used to connect with the standalone electron devtools conditionally from the Vue menu.
iconPreferredCase- Defaults tounocssformat (i-material-symbols-home). Icon format to be used in Vue Designer’s icon-picker (fork of the Icones app).
plugins- an array of Pinegrow plugins. Refer to Pinegrow Plugins guide for further details.
tailwindcss- used to passcssPathandconfigPathfor using Tailwind CSS addon in Vue Designer.
Note:
- The integration modules for Meta-frameworks like Nuxt, Iles, etc., are simply wrappers of the Pinegrow Vite Plugin. The Config Panel will display instructions specific to the Meta-framework for configuring the
liveDesigneroptions. - The
liveDesignermodule can also take configKeys (inspired by Nuxt module authoring, see example in nuxt tailwind module) to consume options for Pinegrow plugins. For eg,tailwindcsskey is used with@pinegrow/tailwindcss-plugin.
Once setup is completed, start your dev-server, and open your startup page, as previously covered in the Config Panel guide.
If you have any issues with establishing the connection, refer to the troubleshooting guide.
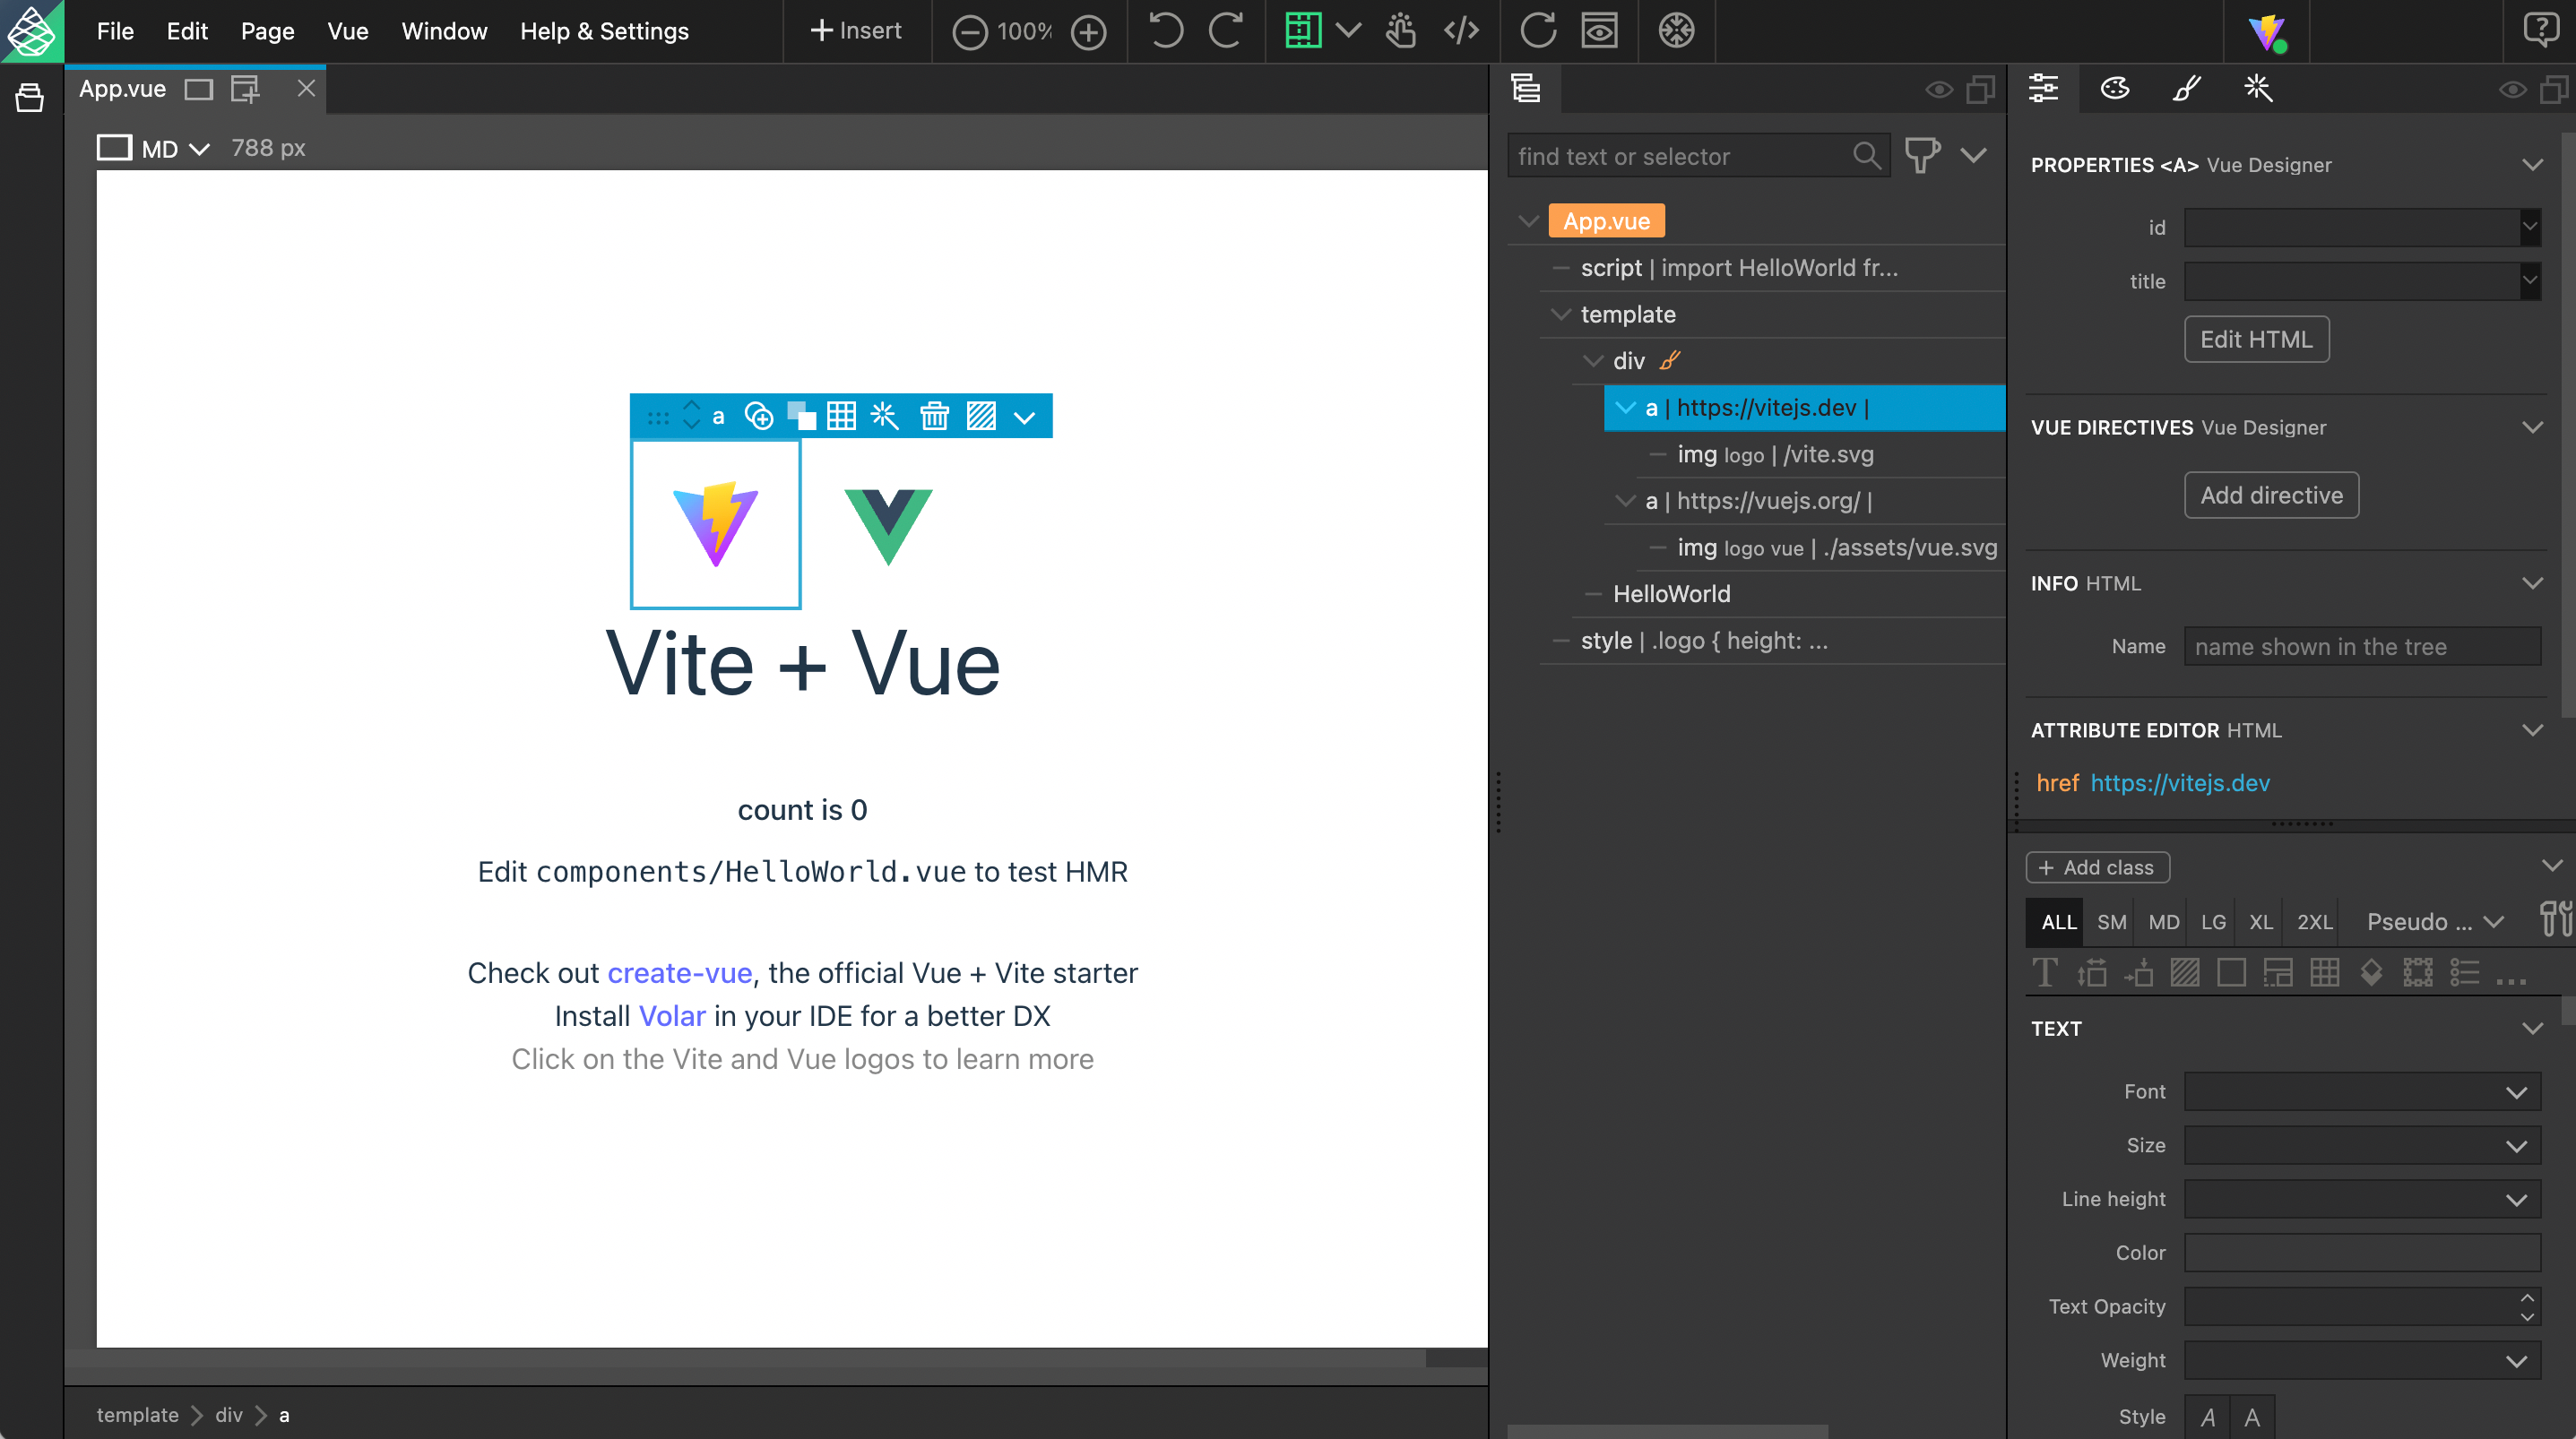
Congratulations! You have successfully added the required integration plugins/modules to your project.
If you used one of the quick-start templates (or) sample apps from the start-screen, these integration modules are already added, so you don’t have to go through the above process and can quickly start working in Vue Designer.
How about Tailwind CSS
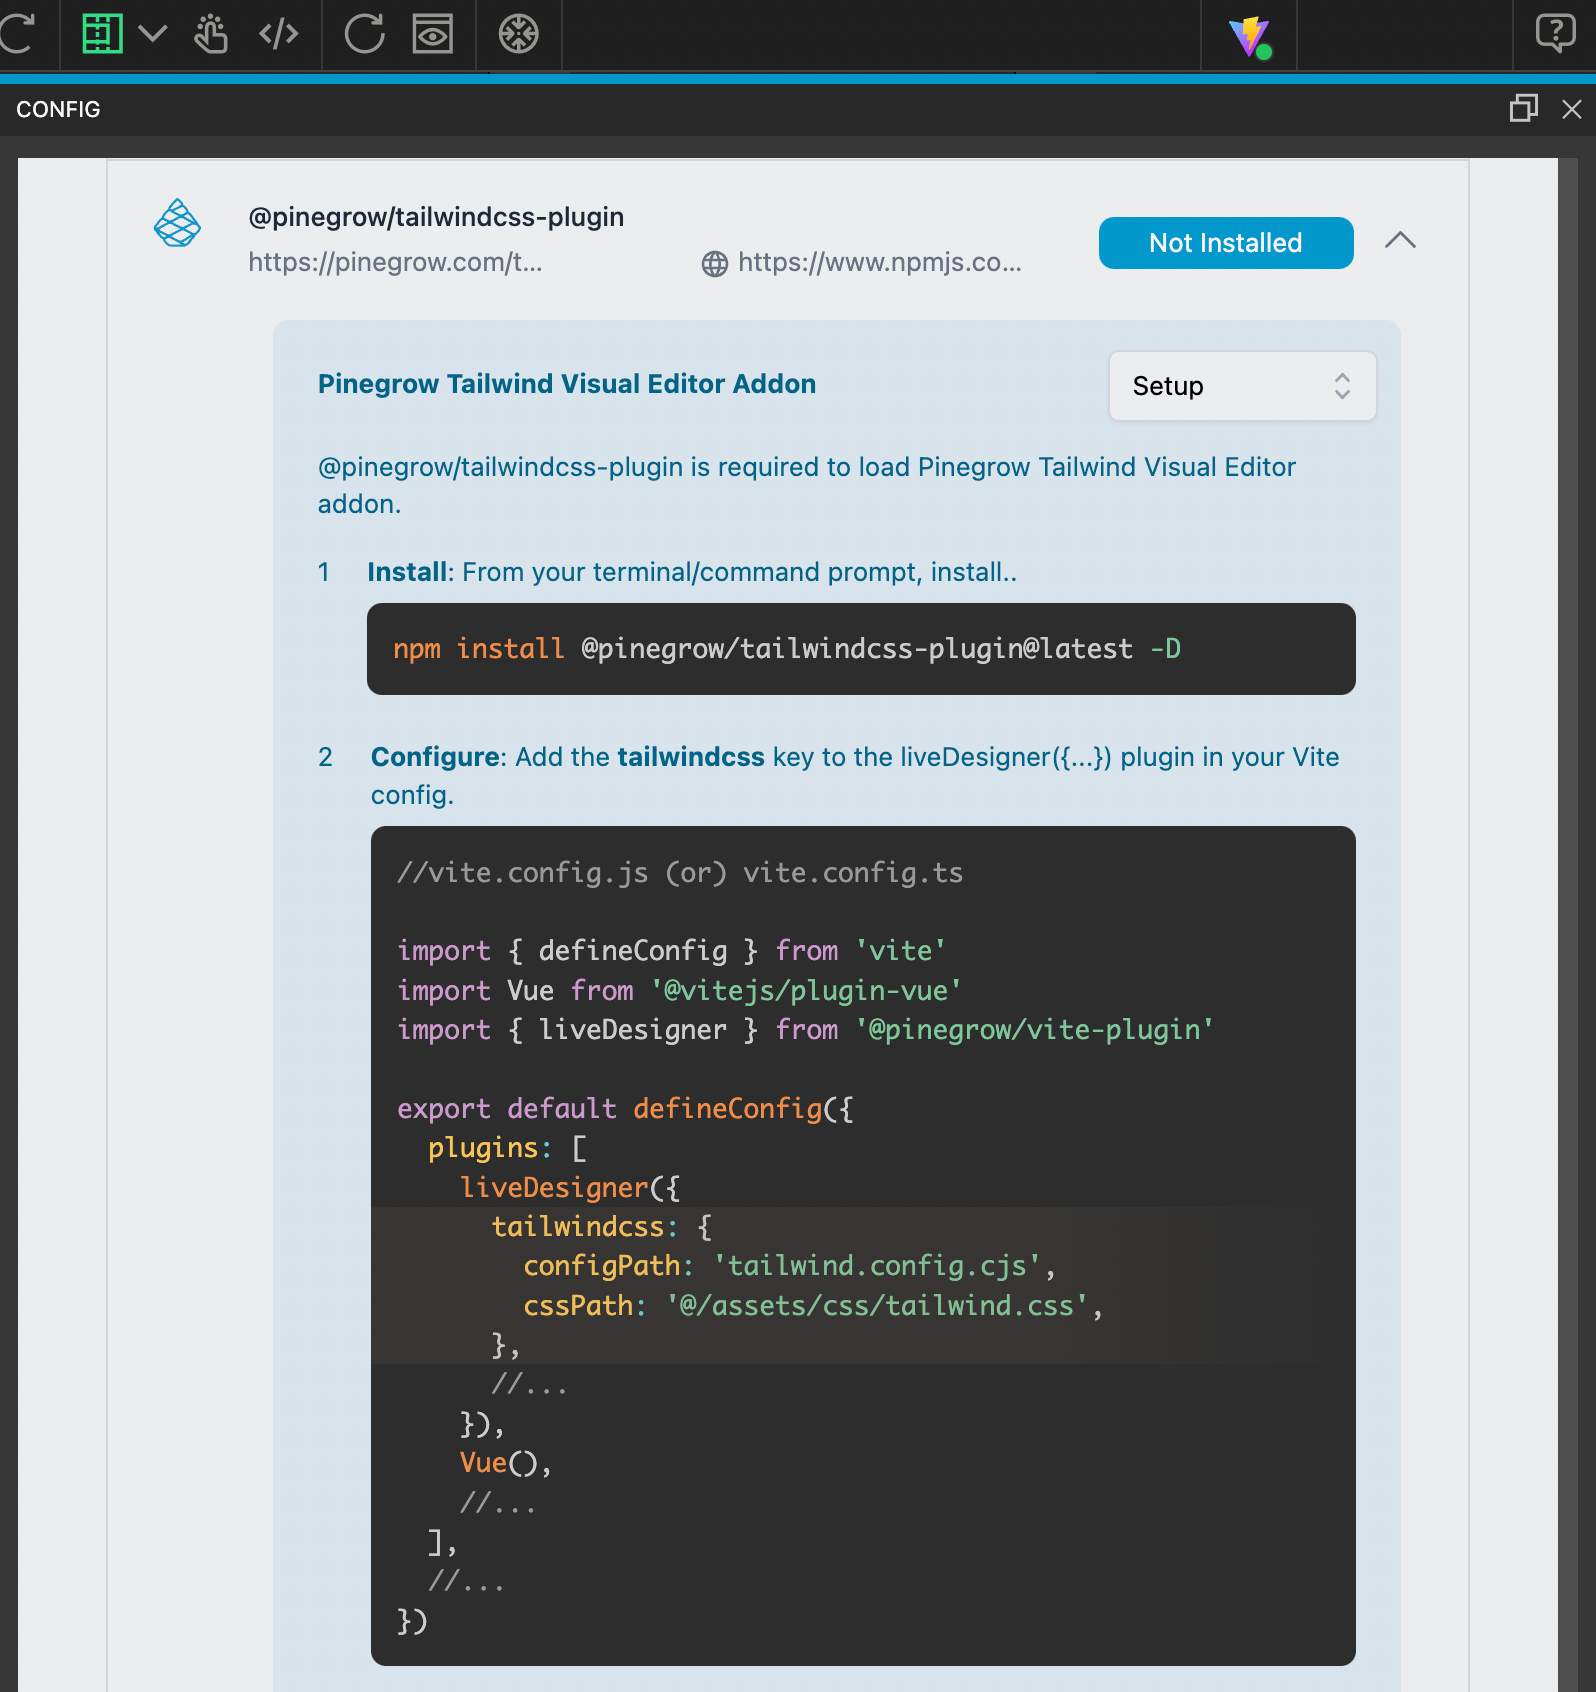
Yes, our configuration is not complete yet. Open the Config Panel and scroll down to follow the instructions to install and configure the Pinegrow Tailwind CSS plugin.
Take care to pass the correct configPath and cssPath options within liveDesigner > tailwindcss configuration.
Well done! You are now hands-on with the Config Panel.
Additional Packages
The Config Panel also provides detailed instructions (in other tabs) for using other Vue Designer features, such as: